Pages

Monday, 26 December 2011

What IS Boxing Day Anyway?


The day after Christmas.  Boxing Day.  We think of it mostly as a shopping day:  The day when everything that was priced up for Christmas is priced down for quick sale.  It has long been the day when frugal shoppers look for savings on next year’s Christmas wrap, on seasonal items like red and green tortilla chips and breakfast cereals, on winter coats, and on electronics.  There are, however some much older and more benevolent traditions behind this day.

December 26 is St. Stephen’s Day (the Feast of St. Stephen) for western Christian churches.  For centuries, churches put metal boxes outside their doors on the Feast of St. Stephen, into which parishioners deposited food for the poor.  Wealthy nobles marked the day and demonstrated their piety by committing acts of charity.

Do you remember the carol about Good King Wenceslas?  Actually a Bohemian duke, Wenceslas was honoured as a saint and posthumously awarded the title of king because of his acts of charity.  Most famous of these is the story in the carol; a recounting of how, on St. Stephen’s Day, he ventured out into the snow to deliver firewood and food to the home of a struggling peasant.  He took with him a single page and when the page found the snow and cold too much to cope with, took the lead himself, enabling the page to make his way through the path Wenceslas had broken in the snow.

The true story of Wenceslas is lost to history—he lived nearly a thousand years ago—but upon his death a cult grew up around him in both Bohemia and England.  Within decades, four different biographies had been written about him.  The legend of his generosity had a powerful influence on the High Middle Ages conceptualization of the rex justus, or "righteous king"—that is, a monarch whose power stems mainly from his great piety, as well as from his princely vigour.[i]

Although the tradition of giving alms to the poor on St. Stephen’s Day has continued on right into this century, in Britain a second, more temporal, tradition arose as well:  In order to ensure the smooth running of the household on Christmas Day, those who employed servants would allow them a day with their families on December 26. 

On Boxing Day, the gentry gave their servants bonuses and boxes of gifts to take home with them, and also gave Christmas boxes to tradesmen to thank them for their good service throughout the year.  This more recent Boxing Day tradition came to Canada (and spread throughout the rest of the British empire) with English settlers during the eighteenth and nineteenth centuries. 

Until quite recently, businesses were closed on Boxing Day.  It was observed as a statutory holiday all across Canada.  About fifty years ago, though, enterprising merchants saw an opportunity in this day off and began opening their doors to holiday-makers; offering sales to draw them in. 

Boxing Day has since become an optional holiday in most provinces, and many Canadians now find themselves hard at work on December 26.  The traditions originally centered around this holiday have faded over time and most people are no longer aware of its philanthropic past.  Commerce has become the primary focus, and much of our population spends Boxing Day either spending money or serving those who are shopping.

Why am I telling you all this?

Well, I’m certainly not a preacher so I won’t exhort you to “get thee to a church,” and I would never wax rhapsodic about the “good old days” of master and servant.  I am well aware of the hardships and inequalities that existed during those times. 

I dislike the commercialization that has arisen around the holiday season and I wish that everyone had the opportunity to stay home with their families today, but I also like shopping as much as the next person.  I'm always pleased to get better value for my money.

I do think, though, that we could take something of value from the earlier traditions of Boxing Day, by carrying its history of philanthropy forward.

Some of us are fortunate enough to have enjoyed gifts and holiday feasts in the past week or two but there are also people within our communities who are in need.  Their needs will continue, and in many cases increase, in the days and weeks after the holidays. 

Many food banks are closed for a week or two after Christmas, placing increased demand upon soup kitchens.  If there is a community kitchen where you live and you are able to contribute, please consider picking up some extra produce while you’re out shopping, and dropping it off at their door. 

If there is a seniors’ drop in center that serves lunch in your area, you might consider donating a pot of soup. 

If there’s a woman’s center open, a gift of blankets, diapers, or formula would be appropriate.  There’s always a need for these items. 

If none of these facilities are open in your area, you can pick up some extra non-perishable food items to donate when the food bank’s doors re-open.  After the seasonal closures, the demands upon them will be huge.

Happy Boxing Day.  My wish for all of you today is the same wish I hold in my heart every other day:  That you have a safe home, enough food, good health, and people who love you.  If you are in need of any of these things, you’re in my thoughts.  I hope that they find their way to you very soon.


[i] http://en.wikipedia.org/wiki/Good_King_Wenceslas
photo:  bigcitybeerbudget.blogspot.com

Saturday, 24 December 2011

Snickerdoodles For Santa


I owe Santa a lot.  Despite the fact we barely know each other, he’s come to my house year after year; an almost-stranger who strives unselfishly to give me my heart’s desire.  How many people can you say that about?

I’m grateful for what Santa’s taught me about generosity and I admire his work ethic.  I mean, he’s not getting any younger is he?  And yet every year he works unbelievably long hours in all sorts of weather.  He travels his whole route with no one to keep him company but his reindeer, climbing in and out of his sleigh, and up and down rooftops and chimneys.  You’ve just got to appreciate all that he puts into his work.

Every year we have a big discussion about how to thank Santa for all that he does for us.  We want to leave him something to eat, of course, but it’s hard to decide just what.  Do we go with tradition and offer milk and cookies?  Keeping his well-being in mind, do we make Santa a cup of green tea and a heart-healthy snack?  Surely on such a long shift he’s entitled to a dinner break.  Do we leave him a whole meal?  A thermos of soup and some sandwiches?  We would offer a grown up beverage but we know he has to drive…

In the end, tradition usually wins and we decide on milk and cookies.  Not that the discussion ends there.  After all, we have to make sure that the cookies are worthy of their recipient.  No cookie-come-latelys find their way onto our Santa plate!  One family favourite or another is always the rule.

This year, we're leaving Snickerdoodles for Santa.  My Snickerdoodle recipe comes to me from my grandma.  They are a special favourite of my sister's, but everyone in the family loves them.  I’m sure that fond memories contribute as much to our enjoyment of these cookies as their flavour does.That having been said, Snickerdoodles truly are a wonderful treat:  An old-timey, light textured sugar cookie inside a coating of cinnamon and sugar.

If you'd like to make Snickerdoodles, you’ll need:

  • 1 cup butter
  • 1-1/4 cups sugar, plus 1/4 cup for rolling the cookies in
  • 2 large eggs
  • 2-3/4 cups all purpose flour
  • 2 teaspoons cream of tartar
  • 1 teaspoon baking soda
  • 1/4 teaspoon salt
  • 2 Tablespoons cinnamon

Cream the butter and 1-1/4 cups sugar together.  Beat in the eggs until blended.


Whisk together the flour, cream of tartar, baking soda, and salt.   Mix the flour mixture into the butter mixture, to make a firm, slightly crumbly dough.


Mix the remaining 1/4 cup of sugar with the cinnamon until the two are well combined.

Form the dough into 1-1/2 inch balls.  Roll the balls of dough in the sugar-cinnamon mixture.


Place the cookies about 2 inches apart on ungreased cookie sheets.  (I line mine with parchment for easier cleanup.)


Bake the cookies at 400˚F for 10 to 12 minutes.  Cool the cookies on brown paper before storing them in an airtight container (or serving them to Santa).

And don’t forget to enjoy a cookie or two yourself. Santa would want you to.  :^)

Banana Cookies


How to drive your wife crazy:  

Eat bananas like they’re going out of style, then suddenly stop.  Repeat with banana bread. 

Works every time.  Has for years at our house.   ;^)

I have a cache of bananas in the deep freeze.  It explains why I am constantly looking for new banana recipes. 

This banana recipe is a particularly good one.  Like many of my favourites, it comes from “The Fanny Farmer Baking Book,” by Marion Cunningham.  

These cookies are inexpensive to make and they have a lovely flavour; a pleasing combination of banana and lemon. They're inexpensive to make and, because the recipe contains no eggs, the batter is a safe treat for the raw cookie dough fans in the household. (Me!)

To make Banana Cookies, you’ll need:

  • 1 cup butter
  • 1 cup sugar
  • The zest of one lemon
  • 2 teaspoons lemon juice
  • 1/2 cup mashed banana
  • 2 cups flour
  • 1/2 teaspoon baking soda
  • 1/4 teaspoon salt
  • 1/2 cup chopped walnuts

Cream together the butter and sugar, and beat them until they’re light and fluffy.  Add the lemon zest, juice and mashed banana and beat well.


Whisk together the flour, baking soda, and salt. Add the flour mixture to the banana mixture and mix well to make a stiff but sticky dough.  Stir in the walnuts.


Scoop heaping teaspoonfuls of dough and place them about 2 inches apart, on parchment lined cookie sheets.  Flatten the dough slightly with your moistened fingertips so that each round is about 1/3 inch thick and 1-1/2 inches in diameter.


Bake at 400˚F for about 8 minutes, until the edges of the cookies are slightly browned. 

Cool the cookies on a sheet of brown paper.  Store them in an airtight container.

Peanut Krispie Squares


This recipe originated in Jean Paré’s book, “Company’s Coming; 150 Delicious Cookies and Squares.”  Mrs. Paré is something of a phenomenon here in Canada, having published a whole series of cookbooks, but I’m not usually one of her fans.  I find her recipes are often cloyingly sweet, and she calls for a lot of convenience food that I just don’t keep on hand.

I have a friend who holds a different opinion.  She's a huge fan of the "Company's Coming" series and has all of Mrs. Paré's cookbooks.  She urged me to try this particular recipe, and even went so far as to copy it out and mail it to me.  I’d been told repeatedly—and by a number of different people—that these Peanut Krispie Squares are very good so, when the recipe came in the mail, I decided to give it a try. 

I made the squares exactly as directed in the recipe.  My husband loved them. I thought they were okay, but not brilliant.  I do think, though, that if you “grow them up” a little bit by making a couple of changes, they have the potential to be something truly delicious.

Here's the recipe just as I made it the first time, together with my notes on how I might change it.   Please do read all the way through and then make your own choices about what to include.

To make Peanut Krispie Squares, you’ll need:

  • 1/2 cup peanut butter
  • 1/2 cup corn syrup
  • 1/2 cup brown sugar, firmly packed
  • 1/4 cup butter
  • 3 cups Rice Krispie cereal

Heat the peanut butter, corn syrup, sugar, and butter in a saucepan over low heat.  Stir as you heat it.

Pour the hot mixture over Rice Krispies and stir well to coat the cereal evenly.  Press the cereal mixture into a greased 8 x 8 inch pan. 

Frost the squares with an icing made from:
  • 1/2 cup butter
  • 1/3 cup cocoa
  • 1/2 cup sugar

    Combine the 3 ingredients in a small sauce pan.  Heat and stir until melted and dissolved.  Chill to spreading consistency and then spread over the bars.  Chill again until the icing is set, then cut the square into serving sized pieces. 

    Notes:

    Substituting 1 cup of salted, roasted peanuts for 1 cup of the Rice Krispies will add a salty counterpoint and some extra crunch to this sweet bar.

    I found that the granulated sugar didn't dissolve well in the icing, resulting in an unpleasant grainy texture and, while the icing was not too sweet, the butter tended to separate into a layer on the top as the icing cooled.   It would probably be worthwhile to use icing sugar (powdered sugar) instead, or to replace the icing with ganache.

    To make ganache, chop 8 ounces of bittersweet or semisweet chocolate.  Place it in a heat proof bowl.  Heat  3/4 cup  of cream to a simmer—not a boil—and pour it over the chopped chocolate.  Stir until the chocolate dissolves. 

    If you use ganache, spread it over the top of the cereal mixture and let it cool at room temperature.  It’ll set to a firmer consistency but won’t harden completely.

    While the icing or ganache is still soft, I would garnish the squares by sprinkling a few more  chopped salted, roasted peanuts over the top. 

    Friday, 23 December 2011

    Parmesan Cayenne Shortbread


    This is another cheese-y shortbread, but different from the Shortbread Cheesies I posted earlier this month.  These cookies are shaped into balls and then a well is made in the center of each cookie.  They are baked without a filling and then, just before serving, they’re garnished with pepper jam or jelly. 

    The recipe makes a large batch.  If you don’t want to bake them all at once, the dough can be divided into smaller portions, wrapped in plastic wrap, and then frozen. 

    These little shortbreads are a bit fussy to make, but quite beautiful when finished.  You’ll love the salty-cheese-y flavour of these cookies, and the little bit of heat the cayenne pepper brings to the party.  Your guests will too.  Just be sure to warn them that these shortbread are a savoury treat.  I’ve caught a few people by surprise because they are so pretty looking that people assume they’re a sweet!

    To make Parmesan Cayenne Shortbread, you’ll need:

    • 1 pound of butter, softened
    • 1/2 to 1 teaspoon cayenne pepper
    • 1/2 cup cornstarch
    • 3-1/4 cups all purpose flour
    • 2 cups parmesan cheese
    • Walnuts or pecans to garnish each cookie
    • Pepper jam or jelly (I used homemade but the stuff from the deli is just fine too)

    Cream the butter, cayenne pepper, and cornstarch together.  Add in the flour and the parmesan cheese, mixing first with a spoon and then by hand.  The dough will be crumbly but will hold together when you press it with your hands.


    Cover the bowl with plastic wrap and refrigerate it for at least 1/2 hour.

    Shape the cookies into 1 inch balls.  (I scoop the dough with a small ice cream scoop and then roll it between my hands until it sticks together.)  Place the balls about an inch apart on a parchment lined cookie sheet

    Use the handle of your wooden spoon to make a well in the center of each cookie dough ball.  The dough may crack when you do this.  Use your fingers to press it together around the handle of the spoon.


    Press a walnut half or pecan half into each cookie as shown here:


    Bake the cookies at 325ºF for about 12 to 15 minutes, until they are golden brown on the bottom.  The tops of the cookies won’t take on much colour.

    Sometimes the walnuts fall off the cookies during baking.  If that happens, press them back into place as soon as you take the cookies out of the oven—before they set up.

    Carefully transfer the cookies to a sheet of brown paper and leave them to cool.  Store the cooled cookies in an airtight container.

    When you’re ready to serve the shortbread, spoon a little pepper jam or jelly into the well in the center of each cookie.  (They’re even better if you warm them a bit in the oven before spooning in the jam.)

    Serve them on a pretty plate and prepare to be adored.
    ___________________________________________

    This post has been linked to Life as Mom's Ultimate Recipe Swap.

    Thursday, 22 December 2011

    Carrot Pineapple Muffins


    Canned crushed pineapple is a good thing to have in the pantry.  It works well in many baked goods and it’s one of our favourite pizza toppings.  It’s an affordable ingredient too.  I used a single can of pineapple to make both my Pineapple Ginger Cookies and these tasty muffins.

    Pineapple Carrot Muffins are a welcome guest on our breakfast table.  They’re moist, flavourful, and easy to bake.  If I need something quick and easy to offer a guest, they can be assembled quickly and served while still warm; lovely with a cup of tea.

    To make Pineapple Carrot Muffins, you’ll need:


    • 2 eggs
    • 1/3 cup vegetable oil
    • 1/2 cup crushed pineapple, drained
    • 1/4 cup pineapple juice, reserved from the drained pineapple
    • 3/4 cup brown sugar, lightly packed
    • 1/2 cup grated carrot
    • 1-1/4 cups all purpose flour
    • 1-1/2 teaspoons baking powder
    • 1/4 teaspoon baking soda
    • 1/2 teaspoon salt
    • 1/2 teaspoon cinnamon
    • 1/4 teaspoon ground ginger
    • 1/4 teaspoon nutmeg
    • 1/2 cup of golden raisins, soaked in warm water and drained (not pictured)

    In a large bowl, beat the eggs, then add the vegetable oil and brown sugar, stirring until well combined.  Mix in the drained crushed pineapple, the pineapple juice, and the grated carrot.  Stir again until the ingredients are well mixed.


    Whisk together the flour, baking powder, baking soda, salt, cinnamon, ground ginger, and nutmeg.  When the dry ingredients are well combined, add the golden raisins and toss them until they’re lightly coated in the flour mixture.

    Add the dry mixture to the wet ingredients, stirring just until they’re combined. 


    Spoon the batter into a buttered muffin tin.  I got 8 large muffins out of this recipe.  If you don't have enough batter to fill all 12 muffin cups, put a little water into the empty cups.  It'll help to keep the heat evenly distributed throughout the pan and to prevent your tin from warping. 


    Bake the muffins at 350˚F for about 25 minutes until they spring back when lightly touched.  Cool the muffins in the muffin tin for 10 minutes, then turn them out onto a wire rack to cool completely.


    Note:  This batter makes a fine loaf as well as good muffins.  To bake this recipe as a loaf, butter a loaf pan and line the bottom of the pan with a piece of parchment paper.  Butter the paper. 

    Turn the batter out into the prepared pan, spreading it so that it’s an even depth throughout. 

    Cook the loaf in the center of the oven, at 325˚F, for about 50 minutes.  If the loaf looks like it’s developing too much crust, cover the top of the pan with foil and put a baking pan on the rack below the rack the loaf pan is resting on.

    The loaf is cooked when a skewer inserted into the center comes out clean.

     Once the loaf is baked, allow it to cool completely in the pan before serving it.

    Fruit Jello Cookies


    This recipe came to me in an insert packaged with a Rycraft cookie stamp.  The stamp was given to me as a gift almost twenty years ago.  I don’t use it much any more but I do use the recipe quite often.  Kids love the bright colour and fruit flavour of these cookies and I like the fact that the recipe is inexpensive to make and easy to work with.  The dough rises very little, making it excellent for use with cookie cutters.  I can vary the colours and shapes of the cookies according to the occasion.

    To make Fruit Jello Cookies, you’ll need:


    • 1/2 cup sugar
    • 3/4 cup butter
    • 1-3 oz. package of fruit flavoured Jello (Use the sweetened kind.  You need the sugar in the packet for the recipe to work.)
    • 2 eggs
    • 1 teaspoon vanilla extract
    • 2-1/2 cups flour
    • 1 teaspoon baking powder
    • 1 teaspoon salt

    Cream together the butter, sugar, and Jello mix.  Mix in the eggs and vanilla extract to make a smooth batter.


    Whisk together the flour, baking powder and salt.  Stir them into the butter mixture to make a firm dough.


    Form the dough into balls (I use a small ice cream scoop for this) and place them on a parchment paper lined cookie sheet.  Press the cookies flat, leaving them about 1/4 inch thick.  (I use the bottom of a drinking glass—lightly floured—to do this.)


    Bake the cookies at 375ºF for 6 to 8 minutes. 

    Remove the baked cookies to a sheet of brown paper and allow them to cool completely.

    If you wish to, you can ice the cookies.  I use Royal Icing for this because it dries hard, making the finished cookies easier to store.

    To make Royal Icing, you’ll need:


    • 3 cups icing sugar (powdered sugar)
    • 2 egg whites
    • 1 Tablespoon of lime juice (or lemon juice if you’re not making lime flavoured cookies)
    • 1/4 teaspoon salt

    Combine all the ingredients in a large mixing bowl and beat them at high speed until the icing becomes light in texture and forms stiff peaks.


    If you’re not going to use the icing immediately, store it in a covered container in the fridge or freezer.  If the icing is too thick, thin it with a little more juice or some water.
    Spread the icing on the cookies.  The icing dries quite quickly so, if you’re adding sprinkles or coloured sugar, apply them immediately.  

    I like to add just a few sprinkles to tops of my cookies.  My husband was helping me last night and he takes a much more direct approach, dunking the iced side of the cookie right into the sprinkle bowl.   I’ve always said my guy is really just a big kid   ;^)   and kids, being kids, do tend to prefer this more-is-better approach.  Either way, the cookies are unlikely to last long enough to foster a debate about which decorating style looks better.


    Note:  If you plan to roll the cookie dough out and use cookie cutters, add an extra 1/4 cup of flour to the dough.  Refrigerate the dough for about 1/2 hour, then roll it out between sheets of waxed paper.  Rolling this way prevents the dough from picking up extra flour so you can roll it out multiple times without it becoming too tough.
    __________________________________________
    This post is linked to Mix It Up Monday hosted by Flour Me With Love

    Mixitup

    Tuesday, 20 December 2011

    Ugh!


    My baking recipes have been notably absent the past few days.  I apologize.  I'm in bed, sick.  I'll be back as soon as I can and I'll double up until we're caught up again.

    I hope that you are all well, and that you're finding sunshine every day...Even if it comes in the form of beautiful white snowflakes!  ;^)

    Photo source: blogs.coventrytelegraph.net

    Saturday, 17 December 2011

    Pineapple Ginger Cookies


    I had a baking fail today.  I was working on a new cookie recipe and it was not good.  It's kind of hard to explain what went wrong, but let’s just say that the results completely underwhelmed me.  I’m back to the drawing board with that one.  Fortunately, my second recipe turned out well.


    These Pineapple Ginger Cookies were inspired by a conversation with my friend Ann Andersen, who told me about some pineapple cookies she’d baked.  They turned out okay but she thought they tasted a little bland. She was looking for a way to jazz them up a bit. 

    I have a number of pineapple cookie recipes too, and they’ve all struck me as uninspiring.  I decided to revisit one of them and liven it up with some spice.  I added both powdered and chopped crystallized ginger to the cookie batter.  The resulting cookie was soft and cake-like, with moisture and sweetness from the pineapple, and a peppery kick from the ginger.

    I’m glad I kept notes as I was baking because this recipe’s a keeper.  I’ll be making it again. 

    To make Pineapple Ginger Cookies, you’ll need:


    • 1/2 cup butter
    • 1 cup brown sugar
    • 1 egg
    • 1 teaspoon vanilla (not pictured)
    • 1 cup canned crushed pineapple, undrained
    • 2 cups flour
    • 1 teaspoon baking soda
    • 1/4 teaspoon salt
    • 1 teaspoon powdered ginger
    • 1/2 cup diced crystallized ginger (1/4 inch dice)

    Cream the butter and sugar, then add the egg and vanilla and beat until light and fluffy.  Beat in the pineapple.


    Whisk together the flour, baking soda, salt, and powdered ginger.  Add the crystallized ginger.  The pieces of crystallized ginger will want to stick to each other so break them apart into individual bits with your fingers.  Toss the ginger pieces in the flour mixture.


    Add the flour mixture to the pineapple mixture and stir until the batter is thoroughly blended.


    Line some cookie sheets with parchment paper then drop rounded teaspoonfuls of cookie dough onto the lined pans, spacing the cookies about 2 inches apart. 


    Bake at 350ºF for about 10 minutes until the cookies are just turning golden around the edges.  The bottom of the cookies should be lightly browned.

    Let the cookies cool on the cookie sheet for about 2 minutes before transferring them to a sheet of brown paper to cool completely.  Store the cooled cookies in an airtight container.

    Friday, 16 December 2011

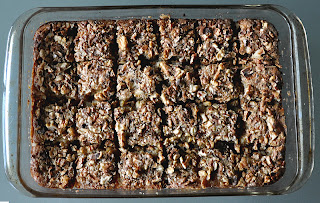
    Maple Walnut Squares


    I never buy maple syrup.  It’s not that I don’t like it.  I do, but our limited budget doesn’t allow for such luxuries.  You can imagine my delight, then, at receiving a bottle of maple syrup as a gift this week.  What a treat!  I will, of course, be enjoying it with pancakes but I thought I’d like to bake with it too so I went in search of a recipe.

    Often, when I’m looking for a baking recipe, I begin with Marion Cunningham’s “Fannie Farmer Baking Book.”  There’s a good variety to choose from there and I’ve never had one of her recipes fail.  Today’s recipe is one of hers; baked with walnut pieces instead of pecans because we are fortunate enough to have a walnut tree from which we harvested this fall.

    To make Maple Walnut Squares you’ll need:

    • 1 cup butter
    • 1-1/2 cups sugar
    • 1 egg yolk
    • 2 cups all purpose flour
    • 2 eggs
    • 1/2 cup maple syrup
    • 1-1/2 cups coarsely chopped walnuts

    Cream together the butter and 1 cup of the sugar.  Mix in the egg yolk so that it is well incorporated.  Add the flour and, mixing first with a spoon and then with your fingers, work it into the butter mixture to make a crumbly dough.


    Press the dough into a buttered 9 x 13 inch pan.


    Put the 2 eggs in a bowl and beat them until they’re a little bit frothy.   


    Add the remaining 1/2 cup of sugar and the maple syrup.  Beat until frothy.  I used a whisk to do this but don’t recommend it.  A rotary beater will make far quicker work of the job.  If using a rotary beater, beat the mixture for about 1 minute.


    Pour the syrup mixture over the top of the dough and sprinkle the chopped walnuts evenly over the top.


    Bake for 40 to 45 minutes at 350˚F.  The baked square should be caramel coloured.  Check to make sure it’s not soggy in the center by pressing the top with your finger.  It won’t be hard, but it shouldn’t be sticky.

    Remove the pan from the oven and cut the square into pieces while it’s still warm.  It will firm up as it cools.  Allow it to cool completely in the pan, then re-cut the squares before serving.

    Thursday, 15 December 2011

    Chocolate Orange Sandwich Cookies

     
    The inventor of the Oreo cookie would probably tell you that chocolate cookies can taste dry even when baked with the same amounts of fat, liquid, and sugar as not-chocolate cookies.  If you don’t believe me, try making a batch of shortbread, dividing the dough in half, adding chocolate to one half and leaving the other half plain.  Take a bite of each cookie, one after the other, and compare the white shortbread to the chocolate one.  The chocolate shortbread will seem much more dry than the white shortbread.  It’s why Oreos are perfect:  The filling in the middle provides moisture to offset the dryness of the cookies.

    My chocolate orange sandwich cookies are much the same.  They began as a plain chocolate refrigerator cookie recipe, but I found the flavour one dimensional.  I bolstered  the cookies’ flavour by adding some orange zest to the dough and the flavour did improve, but the cookies seemed too dry.  I made the cookies into a sandwich, with orange butter cream icing in the middle and “Voilà!”  I created something really wonderful.

    I don’t make these cookies often.  They take an investment of time and effort.  I don’t always have the patience to wait for the dough to set up in the fridge, or to take the time required to ice the center of each cookie sandwich.  When I do find the time and patience to make them, the contrasting flavours of chocolate and orange paired with the contrasting textures of the cookie and the smooth icing make a wonderful treat.  I enjoy every bite.

    To make the cookies for Chocolate Orange Sandwich cookies, you’ll need:

    • 1 cup butter
    • 1 egg
    • 1 cup sugar
    • 4 ounces unsweetened chocolate, melted
    • The grated zest of one large navel orange
    • 1/3 cup milk
    • 1 teaspoon vanilla extract
    • 3-1/4 cups all purpose flour
    • 1 Tablespoon baking powder
    • 1/2 teaspoon salt

    Beat the butter, sugar, and egg together until the mixture is light and fluffy. 


    Stir in the chocolate and the orange zest.


    Combine the milk and vanilla.

    Sift together the flour, baking powder, and salt. 

     
    Add one quarter of the flour mixture to the butter mixture and stir it in.  Then add one third of the milk mixture and stir it in.  Continue alternating the flour mixture and the milk mixture, ending with the flour, until it’s all mixed into the batter.  It should form a fairly stiff dough.


    Shape the dough into two rolls, each about two inches in diameter. 


    Wrap the rolls in waxed paper and chill them in the fridge for at least two hours or, if you don’t plan to use the cookie dough right away, wrap the rolls in foil and put them in the freezer.  

    At baking time, heat the oven to 350˚F.  Line some cookie sheets with parchment.  Cut the rolls into thin slices—between 1/8 inch and 1/4 inch thick—and place the slices onto the prepared cookie sheets, about an inch apart. 


    Bake the cookies until they feel set when lightly touched, about 12 minutes.  Remove them from the pan immediately and cool them on a sheet of brown paper.


    While the cookies are cooling, make the orange icing to fill them.  To make the icing you’ll need:

     
    • 1/2 cup of butter, softened
    • Some icing sugar (powdered sugar)
    • The grated zest of one orange
    • The juice of two oranges (the one you zested for the cookie dough and the one you zested for the icing)

    Begin by sifting about a cup of icing sugar over the butter.  Add the orange zest and about half of the orange juice.  Beat it all together until it’s very smooth.  Continue adding sugar until the icing is the sweetness and consistency you prefer.  If you need to thin the icing, add some more of the orange juice.  I ended up using about 3/4 of the juice I’d squeezed. 

    To make the cookie sandwiches, turn one cookie upside down and spread a layer of icing across the bottom.  Top the icing with a second cookie, with the bottom of the second cookie facing the icing .  Continue working your way through the batch.

    The icing will probably be a little soft at first but if you leave the cookies out for a couple of hours, the icing will dry a bit and set up.  At that point, store the cookies in an airtight container.