Pages

Monday 24 December 2012

Christmas Jumble Cookies


These cookies came to be a couple of years ago because I looking for a way to us up the bits and bobs left over from my Christmas baking.  I had a little mincemeat left over, a few glace cherries, and some walnuts, so I decided to mix them into one of my go-to cookie doughs.

The finished cookies had a good flavour but they were very plain and not overly sweet.  I filled the cookie jar without saying anything at all about them, not optimistic that Himself the Elf would eat them.  

Much to my surprise, the cookies "evaporated" from the jar at a rapid clip and, when Christmas rolled around the following year, my fella requested that I bake them again. They're now a regular part of my Christmas baking routine.

To make Christmas Jumble Cookies, you'll need:


  • 1/2 cup butter
  • 3/4 cup sugar
  • 1 egg
  • 1/2 teaspoon vanilla extract
  • 1/2 cup mincemeat
  • 1-3/4 cups flour
  • 1/4 teaspoon baking soda
  • 1/2 cups glace cherries, cut in quarters
  • 1/2 cups chopped walnuts


Cream together the butter and sugar.  

Beat the egg and vanilla together.  Mix them into the butter and sugar along with the mincemeat.


Stir together the flour and baking soda.  

Add in the glace cherries and walnuts.  The cherries will want to cling together in a big clump.  Use your hands to work them apart and toss them through the flour so that each piece is coated.


Add the flour mixture to the butter mixture and stir them together until all the flour is moistened and a firm dough is formed.


Scoop the cookie dough onto parchment lined cookie sheets, making 1-1/2 inch balls and spacing them about 2 inches apart.

Dampen your fingers with a little water and then press each cookie to flatten it.  The cookies should be about 1/3 inch thick.


Bake the cookies at 350F for 12 to 15 minutes, until the edges are lightly browned.  

(Insert embarrassed blush here.  I just realized I forgot to take a picture of the cookies after they came out of the oven.  Oops!)

Cool the cookies on racks and store them in an airtight container.  

Both the unbaked dough and the baked cookies freeze very well.  If you form the unbaked dough into cylinders and refrigerate it, then slice it to make thinner, flatter cookies, they make excellent cookie sandwiches.  You can fill them with plain buttercream frosting or with the orange and cream cheese frosting I used on my Cranberry Spice Bars.  

Sunday 23 December 2012

Oat Rich Chocolate Cake


I'm not big on "healthifying" desserts. I make my desserts with the best ingredients I an afford and, because they are splurge-worthy, I enjoy them for what they are.  I'd rather have a small serving of a really good dessert every once in a while than eat more servings of a not-so-tasty but healthier dish.

I believe that treats are called treats for a reason: They're meant to be enjoyed.  

My friend Colleen is much more inclined to look for healthy ingredients in her desserts than I am, and she introduced this cake to me. When I read the ingredients list, I was skeptical.  It's an amazing cake though. 

Deep flavour + moist crumbly texture + a little bite from the oats = crazy good.

To make Oat Rich Chocolate Cake, you'll need:


  • 1/2 cup large flake rolled oats
  • 1/2 cup vegetable oil
  • 1-1/2 cups loosely packed brown sugar
  • 1 cup boiling water
  • 1 cup whole wheat flour
  • 5 Tablespoons cocoa powder (I used Frys)
  • 1 teaspoon baking soda
  • 1 teaspoon baking powder
  • 1/4 teaspoon salt
  • 2 large eggs, beaten
  • 1 teaspoon vanilla extract
  • about 1 cup of jam or jelly (I used cranberry/red wine jelly but rapsberry, blackberry or apricot would be good too)
  • icing sugar for dusting


Combine the oats, oil, and brown sugar in a large mixing bowl.  Add the boiling water and stir to combine.


Allow the oat mixture to rest for 15 minutes.

While the oat mixture is cooling, prepare the pan.  

Butter an 8-inch square pan.

Cut a strip of parchment about 8 inches by 12 and press it into the pan, smoothing it so that the paper sits snug with the bottom of the pan and two of the sides. 

Some of the paper will extend above the pan.  You'll use it as handles to lift the cake out later on.


Whisk the flour, cocoa powder, baking soda, baking powder, and salt together in a separate bowl.

Once the oatmeal mixture has rested for 15 minutes, add in the eggs and vanilla extract and stir them in.  

Add in the flour mixture and stir until there are no dry bits remaining.

Turn the batter into the prepared pan.  It's not a firm batter.  It will look fairly liquid.


Bake the cake on the middle rack of a 350F oven for 40 to 45 minutes.  The cake is done when it springs back when the center is lightly touched.


Allow the cake to cool in the pan. 

When the cake is completely cooled, use the parchment to lift it out of the pan. 

Place the cake on your serving platter and slice it in half horizontally.  

Place the top half of the cake, topside-down, on a plate so that it can be inverted back into place.  

(Trust me.  You want to make sure the cake pieces are supported when you move them.  It's very crumbly and will likely fall apart if you handle it too much.)

Spread the bottom half of the cake with jam or jelly.


Invert the top half of the cake back onto the filling, cut side down.

If the cake top breaks as you put it back in place, don't panic.  Just piece it back together and top it with some whipped cream to hide the damage.  

If the cake is intact, simply dust it with icing sugar.  


Use the cake within three days, or freeze the leftovers.
_________________________________

This recipe came from the Times Colonist newspaper, published in Victoria, BC, Canada.  I'm not sure of the date of publication but I do know that it was written by Eric Akis.

Cranberry Spice Bars with Orange Cream Cheese Frosting


Here I am sharing another riff on a Marion Cunningham recipe; this one Raisin Bars from The Fanny Farmer Baking Book.  

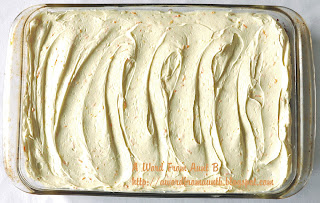
Ms. Cunningham's recipe calls for raisins and an orange glaze.  My recipe is made with dried cranberries and topped with an orange cream cheese frosting. Those are really the only changes I made.  The recipe was already beautifully spiced.  I just made it a little more seasonal.  

These are very, very good.

To make Cranberry Spice Bars, you'll need:


  • 2 cups dried cranberries, coarsely chopped
  • 1 cup water
  • 1/4 cup butter, cut into pieces
  • 1/4 cup vegetable oil
  • 1 egg
  • 1 cup brown sugar, loosely packed
  • 1-3/4 cups flour
  • 1/2 teaspoon salt
  • 1 teaspoon baking soda
  • 1 teaspoon cinnamon
  • 1 teaspoon ground cloves
  • 1 teaspoon ground allspice
  • 1 teaspoon nutmeg
  • 1 cup chopped walnuts


To make the Orange Cream Cheese Frosting, you'll need:


  • 4 ounces cream cheese, cut in pieces, at room temperature
  • 4 ounces butter, cut in pieces, at room temperature
  • the zest and juice of 1 medium sized navel orange
  • icing (confectioners) sugar


Put the cranberries and water in a saucepan and bring them to a boil.

Remove the pan from the heat and stir in the butter and oil until the butter is melted.


Allow the cranberries to cool to lukewarm.

Beat the egg and add it to the cranberries, together with the brown sugar.  Stir until the sugar is incorporated.

Sift together the flour, salt, baking soda, cinnamon, ground cloves, ground allspice, and nutmeg.

Stir the flour mixture into the cranberry mixture.  Mix in the walnuts.


Spread the batter in a buttered or oiled 9 x 13 inch pan. 


Bake the bar at 350F.  

Ms Cunningham's recipe says this bar should bake in 20 minutes.  I find it takes nearer to 40.  The bars are done when a pick is inserted into the center and comes out clean.


Allow the bars to cool in the pan until they reach room temperature.

When the cranberry spice bars have cooled completely, make the frosting.

Beat the butter and cream cheese together until they're completely blended and light in texture.  

Add in the orange zest and about half the orange juice.

Add in the sugar a couple of cups at a time until the frosting is a texture and flavour that pleases you.  If you need to thin the frosting, use the reserved orange juice.  

Spread the frosting over the cranberry spice bars in the pan.  


Allow the bars to rest until the icing has set up a bit, maybe a couple of hours, then score it and cut it.  


Store your cranberry spice bars in their baking pan, covered snugly with plastic wrap.  The bars can be frozen too.

Lace Cookies


This is a recipe from The Fanny Farmer Cookbook by Marion Cunningham.  Like many of the recipes I revisit over and over again, it's very simple to make and uses ingredients I almost always have on hand.  

Brown sugar is the predominant flavour in lace cookies, much as it is with pralines. They're more a candy than a cookie really; a special treat at our house, served for dessert on occasions when I need something that I can make ahead.

Because they are so delicate, lace cookies tend to break apart as you layer them in the cookie tin.  I bake them the day I need them and make just the quantity I need; no more.  I freeze any extra unbaked cookie batter, and store the finished cookies in a single layer, on platters or cookie sheets covered with plastic wrap.  

To make Lace Cookies you'll need:


  • 1-1/2 cups uncooked oatmeal (not instant)
  • 1-1/2 cups light brown sugar, loosely packed
  • 2 Tablespoons flour
  • 1/2 teaspoon salt
  • 2/3 cup melted butter
  • 1 egg
  • 1/2 teaspoon vanilla


Mix the oatmeal, brown sugar, flour and salt together.


Add in the melted butter and stir it through, as if you were making a crumble topping for a fruit crisp.

Beat the egg and vanilla together.

Add them to the oatmeal mixture and stir until they're mixed through.


Portion the cookie mixture out onto a parchment lined cookie sheet.  Use a small amount of dough and make sure there's at least 2 inches space between each cookie.

(I used a scoop that portions out about 1/2 teaspoon quantities.  The dough is crumbly.  You may have to gather up a few bits after you scoop the cookies and press them back into the portion.)  


Bake the cookies until they're lightly browned.  This will happen quite quickly.  Mine took about 7 minutes.

Allow the cookies to cool completely on the cookie sheet.


If you wish to, you can drizzle some melted chocolate over the cooled cookies.

I recently came across instructions for melting chocolate in a freezer bag and then using it like an icing pipe.  I wish I could tell you where I saw it but I didn't bookmark it and now can't find them again.

Anyway...The instructions said to chop the chocolate up, put it in the bag and zip it closed.


Place the bag in the microwave and heat the chocolate until it's about halfway melted.  

Use your fingers to work the chocolate around in the bag until the unmelted pieces have melted too.


Cut one corner off the bottom of the bag and squeeze the chocolate out onto the cookies.

It looked simple enough but I missed one little piece of unmelted chocolate.  It formed a plug in the opening I'd cut.  When it worked its way out it was followed by a big blob of melted chocolate, all of which landed in the center of the first cookie.

Once the unmelted piece was out of the way, the chocolate came out fairly easily.  I just drizzled it randomly all over the place.  


It worked okay but I didn't much care for the untidiness.  

Next time I'll do what we used to do at the bakery:  Melt the chocolate in a small, wide bowl, dip my four fingers into the chocolate and then drizzle the chocolate off my fingers as I move my hand fairly rapidly back and forth over each cookie.  It sounds messy but it's very quick and it works consistently well.  That's how they get the nice evenly spaced drizzles you so often see on professional baked goods. 

Or you could drizzle the chocolate from a spoon.  Whatever works best for you.

Once the chocolate has hardened, the cookies are ready to serve.

Thursday 20 December 2012

Molasses Sandwich Cookies with Buttercream Filling


 I am blessed to have some very good friends; longtime friends who know me so well that things between us can often go unspoken.  

My friend Anna is one of those friends.  We know each other so well that we can comfortably be quiet together.  We often converse in sentence fragments. There's no need to finish the sentences because we each know what the other is thinking anyway.  It's a very comfortable kind of friendship and I value it more than I can begin to tell you here.

Anna's taught me a lot of good plain cooking over the years, including this recipe for molasses sandwich cookies with buttercream filling.  The recipe came to Anna from her friend Shelly.  Shelly got it from her mom.  Shelly's mom got it from her mom.   

I love recipes like that!

These cookies are surprising.: The deep molasses taste of the cookie is pleasantly offset by the sweetness of the filling, the texture of the biscuit by the soft buttercream.  You'll find yourself going back to the cookie jar again and again.

To make Molasses Sandwich Cookies with Buttercream Filling, you'll need:


  • 1 cup butter
  • 1 cup brown sugar, firmly packed
  • 1 cup mild molasses
  • 1 egg
  • 2 teaspoons baking soda
  • 4-1/2 cups all purpose flour
  • 1/2 cup butter
  • icing (confectioners) sugar
  • 2 Tablespoons milk
  • 1/2 teaspoon vanilla extract


Begin by creaming 1 cup of butter and the brown sugar together.

Add in the molasses.

Beat the egg and add it in too.  Stir until these ingredients are well combined.


In another bowl, whisk together the baking soda and flour.

Add the flour mixture to the butter and molasses mixture and work them together.  (I stir mine first with a wooden spoon, then knead it with my hands until it holds together.)  It's a fairly dry dough.


Form the dough into cylinders about 2 inches in diameter, and wrap them in waxed paper.

Chill the dough for at least a couple of hours.  (You can freeze it at this point if you want to.)

Once the dough has chilled, cut it into slices about 1/4 inch thick.

Place the cookie dough slices about 2 inches apart on a parchment lined baking sheet.

Bake the cookies on the middle rack of a 350F oven for 10 to 12 minutes, turning the pans halfway through the cooking time.  


Allow the cookies to cool on the baking pan for about 5 minutes, then transfer them to wire racks to cool completely.

Once the cookies have cooled, make the filling.

Begin by beating 1/2 cup butter until it's quite soft.  

Add in about 2 cups of sifted icing (confectioners) sugar and the milk.  

Beat until the sugar is completely incorporated and then continue adding sifted sugar until the buttercream is the sweetness and consistency you prefer.


(I haven't given you a specific quantity for the sugar because I find that people's tastes vary greatly.)

Once the buttercream is the sweetness and consistency you prefer, begin assembling the cookie sandwiches.  Turn one cookie bottom-side-up and spread on a fairly generous amount of filling.  Top with a second cookie, bottom-side-down , so that the tops of both cookies are facing outward.  

Allow the cookies to sit on your work surface for a while so that the buttercream can set up, then store them in an airtight container.

Wednesday 19 December 2012

Savoury Croissant Bread Pudding With Andouille Sausage


My cousin Lyne and I were chatting about savoury bread puddings recently (she had just made her first and really enjoyed it) and I realized it had been a while since I'd made one myself.

Savoury bread puddings are a handy thing to know how to make.  They're good for any meal: breakfast, brunch, lunch, or dinner.  

Cut into individual portions, savoury bread puddings freeze well. When you're ready to use the portions, they can be thawed in the microwave, then crisped for a few minutes in the oven.  They're a good to keep on hand for rushed mornings or for days when you've forgotten to pack a lunch.

The day after I chatted with my cousin about her savoury bread pudding, my guy came home with a box of croissants from the day old rack at the grocery store.  I had a pound of cooked  andouille sausage in the freezer.  There were eggs and cheese in the fridge, and canned tomatoes on the pantry shelf.  Clearly it was time for me to make a bread pudding too!

We "taste tested" my savoury bread pudding for lunch the day I made it, pronounced it excellent, and put the leftovers in the freezer for another day.  We'll be reheating it for supper tonight and there will still be enough left to make a couple more lunches.  At this busy time of year, I'm especially glad to have it on hand.

To make Savoury Croissant Bread Pudding with Andouille Sausage, you'll need:


  • 1 Tablespoon olive oil
  • 1 medium onion, diced
  • 3/4 cup diced bell pepper (I used red and yellow)
  • 1/2 cup diced celery 
  • 6 day old croissants, torn into pieces
  • 1 pint of tomatoes, drained (Reserve the juice. Break the tomatoes up into bite sized pieces.)
  • 1-1/2 cups grated sharp cheddar cheese
  • 1 pound andouille sausage, removed from its casing, crumbled, cooked and cooled
  • 6 eggs
  • 1 teaspoon salt
  • 1/2 teaspoon dry mustard
  • a generous grind of black pepper
  • the reserved juice from the tomatoes
  • approximately 2-1/2 cups fat free evaporated milk (You can substitute light cream or regular evaporated milk if you prefer them)

Heat the olive oil in a saute pan and, once the pan is hot, add in the onion, bell pepper, and celery.  Saute the vegetables until they're tender crisp.  

Set them aside to cool.


When the vegetables have cooled put them in a large bowl and add in the croissants, tomatoes, cheddar cheese, and andouille sausage.  

Use your hands to gently toss these ingredients together.


Crack the eggs into another bowl.  Add in the salt, mustard, and black pepper. Whisk the eggs until no distinct bits of white or yolk remain. 

Pour the reserved tomato juice into a large measuring cup and add enough evaporated milk to make three cups liquid in total.

Stir the evaporated milk mixture into the egg until it's completely incorporated.


Spread the bread mixture evenly in an oiled or buttered 10 x 15 baking dish and pour the egg mixture over it.  

(You could probably make this in a 9 x 13 pan too but I find that a more shallow layer cooks more quickly and evenly.)


Bake the pudding on the middle rack of a 350F oven for about an hour.  

Begin checking on your baking bread pudding at 45 minutes.  It's done when a knife inserted in the center of the pudding comes out clean.


Served straight from the oven, with a vegetable side dish or two, this savoury pudding makes a hearty, satisfying meal.  

Savoury Croissant Bread Pudding with Andouille Sausage would make an excellent  breakfast or brunch on Christmas morning.  You could prepare the bread and egg mixtures the night before, storing them separately in the refrigerator.  In the morning, you would spread the bread mixture in a prepared baking dish, give the egg mixture a stir, pour it over the bread mixture, and pop the pan in the oven.  

To freeze your bread pudding, cut it into individual servings and place the pieces on a parchment lined baking sheet.  When the pieces are frozen remove them from the baking sheet and package them in a freezer bag.

Tuesday 18 December 2012

Pear and Gingerbread Pancake Bites


I'm sure that if you're on Pinterest all, you'll have noticed that the posts there move in trends.  

I think one good idea inspires another, and another, and so on.  Before you know it, there are a thousand interesting variations on the same theme.

Lately I've been seeing a lot of recipes for pancake bites, made with pancake batter baked in mini muffin tins.  I think they're a great idea.  Kid's like anything bite sized.  Pancake bites are just made for dunking.  Kids love to dunk.  A plate full of pancake bites and a little dish of maple syrup would be breakfast nirvana for a five-year-old.

After reading a few recipes and scanning my pantry, I realized that I had all the ingredients on hand to make my own version of this breakfast treat. 

I found a good recipe for gingerbread pancakes on Yummly; not too sweet, simple to make, and made with ingredients I always have on hand.  I used it to make my pancake bites, and added in some home canned pears for a little extra flavour.  

To make Pear and Gingerbread Pancake Bites, you'll need:


  • 1 egg
  • 1/2 teaspoon vanilla extract
  • 1/4 cup molasses
  • 1-1/4 cups water
  • 1-1/2 cups all purpose flour
  • 1-1/4 teaspoons baking powder
  • 1/4 teaspoon baking soda
  • 1/4 teaspoon salt
  • 1/2 teaspoon ground ginger
  • 1 teaspoon ground cinnamon
  • 1 pint of home canned pears, drained and diced (Mine are dark in colour because they were canned in brown sugar syrup but any cooked or canned pears will be fine.)

Oil or butter the cups of two mini muffin pans.  This recipe makes 36 pancake bites (1-1/2 pans full.)

In a large mixing bowl, beat the egg.

Add in the vanilla extract and molasses and stir until they are completely incorporated into the egg.

Add in the water and mix well.


In another bowl, whisk the flour, baking powder, baking soda, salt, ginger and cinnamon.

Add the flour mixture to the molasses/egg mixture and stir it just until it holds together in a cohesive batter and all the flour is moistened.  (There will be some lumps in the batter. That's okay.)


Put a few pieces of pear in the bottom of each muffin cup. 

Spoon a little of the pancake batter over the pears in each muffin cup, filling the cups to the top.


Bake the pancake bites in a 350F for about 15 minutes.  They'll puff up like little muffins.


Leave the pancake bites in the pan to rest for about 5 minutes, then slide a knife down the edge of each muffin cup to lift them out.  

They're like little tiny upside down cakes, so I chose to serve my pear and gingerbread pancake bites fruit side up.  I plated ours with a little drawn butter and some honey, for dipping, but they were so tasty that I preferred to eat mine plain.


Pancake bites can be frozen.  Freeze them in their muffin pans, then turn them out and package them in an airtight container or freezer bag.  

To reheat them, place the still frozen pancake bites on a parchment lined baking sheet and put them in a 350F oven until heated through.  If you find they are browning too much, cover them loosely with a sheet of foil.