Pages

Wednesday, 14 December 2011

Pâte à Choux


I don’t know exactly when it happened, but somewhere along the way I learned that much of the secret to being considered a good cook is building a repertoire of reliable, adaptable recipes.  It’s not so much a matter of startling creativity—although a good imagination does help—as it is a matter of having a good foundation of knowledge from which to work. 

Almost every good cook I know will tell you that there are some recipes to which they return again and again.  Many are classics.  The mother sauces, a good pie crust, a basic bread recipe, and a few reliable roasts are common reference points for most cooks. 

Pâte à choux is one of those foundation recipes that cooks look to again and again.  Most commonly known to North Americans as the stuff cream puff shells are made of, it is a simple recipe and relatively quick to make.  The finished pastries provide a crisp crust that can be filled with all sorts of foods, both savoury and sweet.  Add some cheese to the dough and you have gougères; a lovely treat that requires no filling at all.  Pâte à choux  freezes very well; yet another reason I keep going back to it as a baking mainstay. 

I’ll be making some up hors d’oeuvre trays next week and, with that in mind, I made small pâte à choux shells today.  I stored them away in the freezer, one less thing to worry about on the day I’m actually delivering my treats. 

To make pâte à choux, you’ll need:


  • 1/2 cup (1 stick) butter 
  • 1 cup water 
  • 1/4 teaspoon salt 
  • 1 cup all purpose flour 
  • 4 eggs

Cut the butter into tablespoon sized pieces and combine it with the water and salt in a heavy bottomed saucepan.  (If you have a non-stick pan you can use for this, it’ll save you some clean up time later.)  Place the pan on medium heat and cook until the butter is melted and the mixture is boiling.

Remove the pan from the heat and add the flour all at once.  Stir vigourously to blend. 

Return the pan to the heat and cook the batter, stirring constantly for 4 to 5 minutes.  The mixture will form a thick mass that clings together.  If you’re not using a non-stick pan, the dough will leave a light film on the bottom of the pot.  When it’s cooked enough, you’ll see almost no wisps of steam rising—an indication the any excess water in the dough has evaporated.  The dough will look like this:


Remove the pan from the heat and let the dough cool for 5 minutes.

Break one of the eggs into the pan and beat vigourously until the egg is completely absorbed into the batter and the dough is smooth.  Add the remaining eggs, one by one, beating until smooth after each addition.  You’ll end up with a thick, very sticky dough that looks like this:


To make round shells like mine, scoop spoonfuls of the dough out of the pot and place them about 2 inches apart on cookie sheets that have been lined with parchment paper.  I used about a tablespoon of dough for each of my shells. 


Once the dough has been placed on the cookie sheets, wet your fingertips in some cold water and use them to smooth the rounds.  Mound them so they’re higher in the center and make sure there are no little peaks standing up from the dough.  They’ll burn if you leave them.


Once the dough has been smoothed, bake your shells in the center of the oven at 375ºF for about 30 minutes, until the dough has risen and has turned golden brown.

Remove the shells from the oven and turn off the heat.  (Now you can see where the name comes from.  They do sort of resemble cabbages.)  


Leave the shells on the baking sheet and pierce each one twice with the point of a sharp knife.


Return the shells to the oven and let them dry out for 10 minutes more.

If you’re not freezing your pâte à choux shells, they should be stored in an airtight container and used as soon as possible.  If you are freezing them, thaw them when you wish to use them and then re-crisp the shells in a 325ºF oven for 10 minutes.

When you're ready to use your pâte à choux shells, cut a "lid" from the top of each shell.  This inside of the shells should look like this:


Gently remove any moist dough from the center of each shell, leaving a fairly substantial wall on the outside.  Once that's done, they're ready for whatever filling you choose to put in them. 


Put the filling into the shells then gently replace the "lids" so they sit on top of the filling. 

I use small shells like these ones for hors d’oeuvres and for sweets, but I make larger ones if I’m planning to use them as a vessel for serving hot fillings with sauces, or for curries or stews.  If I’m making éclairs, I put the dough into a piping bag with a large round tip and pipe it into strips about 4 inches long. 

Baking times will vary depending upon the shape and size you choose to make the pastries.  Your eyes and nose are a better gauge than any timer could be.  You can smell the pastry as it cooks.  Look for that golden brown colour. Once you’ve made them once, you’ll have no problem knowing when they’re done.

Tuesday, 13 December 2011

Oatmeal Scotchies


My grandma used to make a good, very plain, oatmeal cookie that I loved.  When I was compiling family recipes I asked her about it.  She told me that the cookie was actually made from the crust recipe for a date turnover.  She’d copied the recipe from a women’s magazine early in her marriage but found that my grandpa didn’t care for dates.  He did, however, like the oatmeal crust very much, so she made it into cookies. 

Grandma mixed the oatmeal dough, pressed it into a pan and baked it just until it was set.  As soon as it came out of the oven, she cut it into bars. 

I looked forward to those cookies.  Still do.  If you’d like to try the plain version just use the recipe below, omitting the butterscotch chips.

I came to add butterscotch chips to Grandma’s recipe because I was given a bag of them one day and was looking for a way to use them up without having to buy more ingredients.  The oatmeal cookie recipe recommended itself to me because I had everything on hand that I needed to make it, and because it was plain enough to be able to take on other flavours. 

My fella loves, loves, LOVES Oatmeal Scotchies.  I have to stash them away or he’ll eat the whole pan in a day or two. 

Me?  Well, I still like the plain ones best. 

You can try them both ways and then decide which one is your favourite.

To make Oatmeal Scotchies, you’ll need:

  • 1 cup butter
  • 1 cup brown sugar, firmly packed
  • 1/4 cup buttermilk (or put 1 teaspoon of lemon juice in a measuring cup and add enough milk to make 1/4 cup of liquid in total)
  • 1/2 teaspoon baking soda
  • 2 cups rolled oats (not instant)
  • 2 cups flour 
  • 1-300 gram bag of butterscotch chips (300 grams = about 10.6 ounces.  I think these are sold in 12 ounce bags in the U.S.  If you're buying a 12 ounce bag, I'd just go for the gusto and put the whole bag in there.)
Cream the butter and sugar together.  Add the buttermilk and mix well.


In a separate bowl, stir together the baking soda, rolled oats, and flour.

Add the dry mixture to the butter mixture and stir until the dough is crumbly but holds together when you compress it with your hands.


Mix the butterscotch chips into the cookie dough.  It should still be quite crumbly looking.

Line the bottom of a 10 x 15 inch rimmed cookie sheet with parchment paper.

Turn the dough out onto the lined cookie sheet.  Press the dough out so that it’s distributed in an equal thickness all over the pan.


Bake the dough at 350ºF until it’s set around the edges but still a little soft in the middle.  In my oven this takes 15 to 20 minutes. 

Cut the baked dough into bars as soon as you take it out of the oven. 


As you can see, I’m still challenged when it comes to cutting a straight line.  In this case though, it works in my favour.  Jack has more of a sweet tooth than I do so he takes the bigger pieces and I take the smaller ones.

Let the cookies cool completely in the pan before trying to remove them.  Re-cut the bars along the scribed lines from your earlier cut.  Once you’ve made that second cut, they should release from the pan quite easily.

Store the cooled cookies in an airtight container.  They freeze well.

Jack's Favourite Coffee Cake


I apologize for not posting yesterday. I tend to underestimate my limitations and to overestimate the amount of stuff I can accomplish in a single day.

I’m healthier these days and can go for days without remembering that I’m dealing with a chronic problem.  When that happens, I’m a whirlwind of activity; busy with at least ten different things at once and working full tilt from the moment my feet hit the floor in the morning.  I commit to all sorts of activities and then, when I least expect it, my limitations creep up on me and bite me in the butt. 

My weekend was very busy and I paid for it yesterday, scarcely getting out of bed the whole day, and entirely missing the few hours of good light I needed to take photographs for my blog.  To make up for my absence, I’ll be posting two recipes today; one now and one this evening.

This first recipe is yet another taught to me by my friend Anna Genoe.  Anna, if you’re reading this, I hope you know how much I appreciate the things you’ve taught me over the years. 

I’m including this one in my holiday collection because my husband has been asking me to bake it for weeks.  I’m quite sure that he doesn’t view it as strictly a holiday recipe, but coffee cake is his all-time favourite breakfast-time (or any time) treat.  I don’t serve sweets for breakfast all that often, so he viewed my holiday recipe posts as an excuse to get me to make it for him.  I don’t mind really.  It is very good and it’s quick to bake too; a good recipe to have in your files for when unexpected company drops in.

The cake is really very simple:  A vanilla batter, topped with generous amounts of brown sugar and cinnamon.  The magic happens when you drizzle melted butter over the topping before putting the cake in the oven.  The butter wants to sink through the batter and as it does so it draws the topping with it, creating random pockets of wonderful sweet cinnamon and caramelized sugar throughout the cake.

To make Coffee Cake, you’ll need:

  • 1/4 cup (1/2 stick) butter
  • 1-1/2 cups sifted flour
  • 1/2 cup sugar
  • 1 Tablespoon baking powder
  • A pinch of salt
  • 1 egg
  • About 3/4 cup of milk
  • 1 teaspoon vanilla extract
  • 1/4 cup oil (Anna told me to always use Mazola in this recipe but I use sunflower oil now.  Any neutrally flavoured oil will work just as well.)
  • Brown sugar and cinnamon for the topping

Put the butter in a saucepan, on medium-low heat, to melt. 

While the butter is melting, sift the flour, sugar, baking powder, and salt onto a piece of waxed paper. 


Gather the corners of the paper together, two in each hand, to loosely fold the paper lengthwise with the flour mixture inside the fold.  Use the paper to transfer the sifted ingredients into a bowl. 

Make a well in the center of the dry ingredients. 

Crack the egg into a measuring cup and add enough milk to make 1 cup of liquid in total.  Add the vanilla extract to the egg and milk, and whisk these ingredients until they’re well combined.   


Add the liquid to the dry ingredients and stir to mix well.  Add the oil to the batter and stir again until it’s completely incorporated.

Pour the batter into a greased 9-inch square pan.  (I greased mine with oil this time and it tended to well up in the corners of the batter.  You may want to use butter instead.)


Generously cover the surface of the batter with brown sugar.  Sprinkle it on, don’t pack it down, but don’t be shy about the amount.  Sprinkle cinnamon over the brown sugar.


Pour the melted butter over the topping, trying to distribute it evenly. 


Bake the cake at 350ºF for 20 to 25 minutes, until a knife inserted in the center of the cake comes out clean.


This cake is excellent served hot from the oven but it’s also very good served at room temperature.  Cover any leftovers with plastic wrap.  I’m sure they won’t be leftover for very long.

Sunday, 11 December 2011

Krispie Chocolate Chip Cookies


This cookie is a variation of the Toll House cookie recipe that Nestle’s published on their chocolate chip packages for years.  The original recipe is a favourite of mine because it has a slightly salty taste that balances the sweetness.  In this recipe, I’ve added crispy rice cereal to give the cookies a nice bit of added crunch.  The cereal helps to stretch the recipe too, yielding quite a large batch of cookies.  If you’re on a budget, this is a good cookie to keep in mind for cookie exchanges, or bake sales. 

To make Krispie Chocolate Chip Cookies, you’ll need:

  • 2-1/4 cups all purpose flour
  • 1 teaspoon of baking soda
  • 1 teaspoon of salt
  • 1 cup butter
  • 3/4 cup sugar
  • 3/4 cup brown sugar, firmly packed
  • 1 teaspoon vanilla extract
  • 2 eggs
  • 2 cups semi-sweet chocolate chips
  • 4 cups Rice Krispies

In a small bowl, whisk together the flour, baking soda, and salt.

Cream the butter, sugar and brown sugar together.  Beat the eggs and add them to the mixture, along with the vanilla extract.  Mix until well combined.


Add the flour mixture to the butter mixture and stir them together to form a stiff dough.


Add the chocolate chips and the cereal, mixing them into the dough by hand.  Although you’ll have to use some force to mix the dough, try to be as gentle as you can.  Some of the cereal will break as you stir and you want to leave as much of it as possible intact.


Once the dough is mixed, scoop spoonfuls of it and use your hands to form it into rough balls.  Place the formed cookies about 2 inches apart on parchment lined cookie sheets.


Bake the cookies at 350ºF for about 10 minutes.  Let them cool on the cookie sheet for 5 minutes before transferring them to a sheet of brown paper to cool completely.  Store the cookies in an airtight container.

Saturday, 10 December 2011

Cheddar Bacon Biscuits


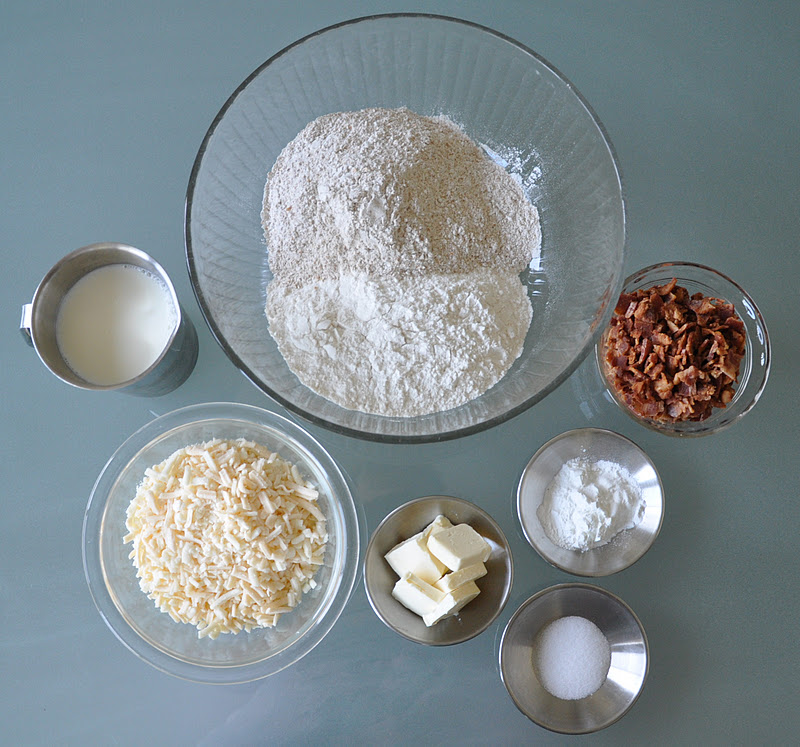
Cheddar bacon biscuits are a Christmas morning favourite at our house.  They use the same ingredients as my Wheat and White Biscuits,  but I've added shredded cheddar cheese, and chopped, cooked bacon.

To make Cheddar Bacon Scones, you’ll need:

  • 2 cups each wholewheat flour and all purpose flour
  • 2 Tablespoons baking powder
  • 1/2 teaspoon salt 
  • 1/4 cup cold butter
  • 2 cups shredded cheddar cheese  (I used an aged white cheddar)
  • 1 pound bacon, cooked crisp, cooled, and then coarsely chopped
  • 1-1/2 cups milk
  • Milk for brushing the top of the scones

Preheat the oven to 400˚F.  Whisk together the flours, baking powder, and salt.

Cut the butter into slices and add the slices to the flour mixture.  Rub the butter between your thumb and fingers to break it down into cornflake-sized pieces. 


Toss the butter gently to distribute it through the flour.  Add the shredded cheese and bacon, tossing the dry ingredients once more.  It's important to break apart the shreds of cheese so they don't clump together in the dough.  They should have a light coating of flour.

Make a well in the center of the bowl.


Add the milk.  Stir until the ingredients mix into a stiff dough.  You may have to knead it a bit to get it to hold together.  I found the mixture a little too dry and ended up adding another tablespoonful of milk.


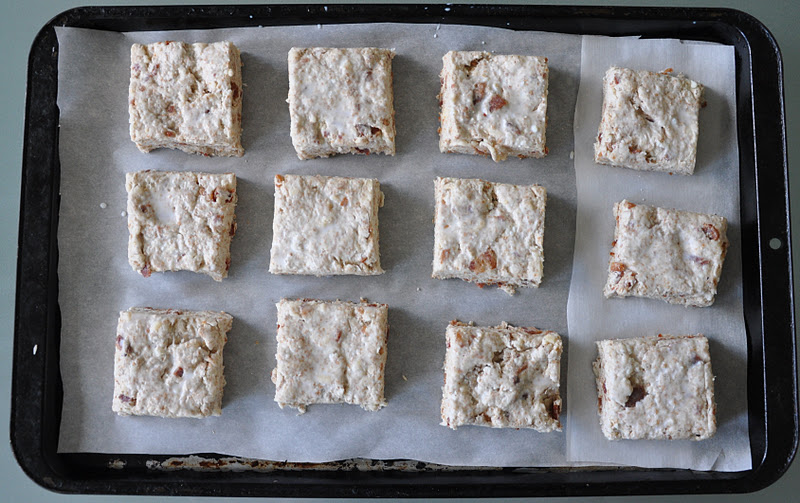
Turn the dough out onto a lightly floured board and roll or pat it out into a rectangle that's about an inch thick. Trim away the rough edges and form them into a biscuit for yourself, then cut the trimmed dough into individual portion-sized squares.  Transfer the biscuits to parchment lined baking sheets. 


Once the biscuits are on the baking sheets, brush the tops with a little milk to help them brown, then bake them at 400˚F for about 12 minutes, until the tops are light brown.
 _______________________________________

This post has been linked to "Lets Do Brunch" by My Sweet and Savory

Friday, 9 December 2011

Orange and Currant Scones


When I have house guests, Christmas breakfast is always something of a conundrum for me:  I want to feed my guests something nice but I also know that we’re going to be eating all day long.  Whatever I offer mu guests shouldn’t be too heavy and it shouldn’t pull them (or me) away from visiting for too long a time.

Over the years I’ve found that the best Christmas breakfasts are those that offer a variety of choices, both sweet and savoury, can be mostly prepared ahead of time, and can be served buffet style.  My guests like to serve themselves, and to have a  number of dishes from which to choose.  With that in mind, I often offer a sweet scone served with a choice of jam or honey, a savoury biscuit served with pepper jam, scrambled eggs or a frittata, fruit salad, and yogurt. 

This menu works for me because, with the exception of the eggs, it can all be prepared ahead of time.  Scones can be baked weeks in advance and then frozen.  If I take them out of the freezer before going to bed on Christmas Eve, all I have to do is pop them in the oven for a few minutes to warm them.

One of my favourite sweet scones is flavoured with orange zest and juice, and studded with currants.  It’s an easy recipe to make and oranges are quite affordable at this time of year.

To make Orange and Currant Scones, you’ll need:

  • 3 cups all-purpose flour
  • 1/3 cup sugar
  • 2-1/2 teaspoons baking powder
  • 1/2 teaspoon baking soda
  • 3/4 teaspoon salt
  • 3/4 cup cold butter, cut into Tablespoon sized pieces
  • 3/4 cup currants
  • The zest of one orange
  • The juice of one orange, squeezed into a measuring cup (Squeeze it above a strainer if the orange is not seedless.)
  • Approximately 1 cup milk
  • Sugar for dusting the top of the scones 

In a large bowl, whisk together the flour , sugar, baking powder, baking soda, and salt.  Add the currants and orange zest.  Stir to mix them through the flour.

Add the butter to the flour mixture.  Rub the butter between your thumb and fingers to break it down into cornflake-sized pieces. Using your fingers, toss the flour mixture lightly to distribute the butter throughout.


Add the orange zest and currants to the dry mixture and toss again, ensuring that they're distributed throughout and that the currants are lightly coated with flour.

Add enough milk to the orange juice to make 1 cup of liquid in total.  The milk will curdle.  That’s fine. 

Form a well in the center of the flour and add the milk mixture all at once.  Stir the mixture with a fork until the liquid is completely incorporated into the dough.  You may need to work it a bit with your hands to get it to hold together.


Turn the dough out onto a lightly floured board and roll or pat it out to about an inch thick,  Use a cookie cutter or a glass to cut out individual scones and transfer them to parchment lined baking sheets.  You can gather the scraps and re-roll them but don’t do this more than once.  Overworking the dough will break down the butter too much, resulting in tough, heavy scones. 

I form the dough scraps into a free form scone that I bake with the others.  I have this roughly shaped scone for my lunch.  I call it my "baker's bonus."

Once the scones are on baking sheets, brush the tops with a little milk and sprinkle them quite liberally with sugar.  The sugar will form a sweet, slightly crunchy crust as the scones bake.


I decided this time that I would make cute little scones, going for a "small but tall" look. As you can see, that didn't work out so well for me.  Some of the scones rose unexpectedly high and toppled right over.  Others took on a definite lean.  Next time I'll use my 3-inch biscuit cutter.  I've had good results with it in the past.


Bake the scones at 400˚F for about 12 minutes, until the tops are light brown.  If you are not serving them immediately, store them in an airtight container.  To reheat them, put them in a single layer on a baking sheet and cover them with foil.  Place in a 350˚F oven for 5 to 10 minutes.

Thursday, 8 December 2011

Thumbprint Cookies


I’m sure that just about everyone already has a recipe for thumbprint cookies.  I’m sharing mine for a couple of reasons though:  Because they’re one of my elder daughter’s favourite cookies, and because my niece Maddy asked for my Christmas baking recipes.  I couldn’t share Christmas recipes without including this one.  I bake these cookies every year.

If you’d like to make my thumbprint cookies, you’ll need:

  • 1/2 pound butter
  • 1-1/2 cups sugar
  • 2 eggs
  • 1 teaspoon vanilla extract         
  • 2 Tablespoons milk
  • 3 cups flour
  • 1/4 teaspoon salt
  • 1/2 teaspoon baking powder
  • 1 cup shredded, unsweetened coconut
  • About 1/2 cup of jam

Cream the butter, then add the sugar and beat the two together.  Add the egg, vanilla and milk.  Mix again.


Whisk the flour, salt and baking powder together.  Add the coconut and stir it through the flour.

Add the dry mixture to the creamed butter mixture and mix them until they’re well combined, to form a stiff dough.


Scoop teaspoonfuls of the dough and roll them into balls.  Place the balls about 2 inches apart on cookie sheets lined with parchment paper.  Poke your finger into each ball of dough to make an indentation in the top center of each cookie.  (You may find it helpful to dip your finger in water before doing this.  It helps prevent the cookie dough from sticking.)


Fill the indentations in each cookie with some jam.


Bake the cookies at 350ºF for 8 to10 minutes, until they’re lightly browned on the bottom.  Let them cool on the cookie sheets for about 5 minutes, then transfer them to brown paper to cool completely.

Store the cookies in an airtight container, with wax paper between each layer to prevent the cookies from sticking together.