Pages

Monday, 4 March 2013

What's Up? (A List of Coming Events in the Cowichan Area)

Every week I compile a list for a business acquaintance, sharing some of the upcoming events in our area.  It occurred to me today that my blog friends who are in or near the Cowichan Valley might find it helpful too, so I've decided to start my list it here as well.  

If you have an event you'd like to add to the list, please email it to me at AuntBsCalendar@gmail.com

Please note that I do not guarantee that your listing will be added to my calendar.  Listings sent to me will be posted only at my discretion. Please be advised that I will not share listings I consider unsuitable for my audience, inappropriate in content, or of a political nature.


Feb. 22 – March 7 – “Buddy, The Buddy Holly Story,” playing at The Chemainus Theater. Info, www.chemainustheatrefeatival.ca

March 1 – April 14 – Upper Island Music Festival. Info, http://www.nanaimomusicfestival.com

March 2 – April 12 – Escape Artists annual show “A Nature Walk,” Loft Gallery, Mill Bay

March 2 – April 30 – Call for volunteers, Somenos Marsh Wildlife Society.  If you are interested in helping out, contact the society at 250-732-0462

March 4, 9:00 a.m. – 11:00 a.m. – “The Right to Food in Canada – A Conversation with the UN Special Rapporteur,” Cowichan Green community Office, 360 Duncan St.

March 4, 1:00 – 3:00 p.m. – Margaret Davies speaks to Cowichan Valley Arthritis Support Group on the health benefits of a vegetarian diet, St. John’s Anglican Church, Duncan

March 4, 6:00 p.m. – “Miss Representation” film showing at Cowichan Library.  Info, 250-746-7661

March 4, 6:30 – 9:30 p.m. – “Burn It Smart” wood heat workshop, Mesachie Room, Island Savings Center

March 4, 8:00 p.m. – Dave Soroka and Dave Roy Parsons performing together, Duncan Garage Showroom

March 5, 4:30 – 5:30 p.m. – Cowichan Agriculture Market Project Focus Groups looking for imput to stimulate connections between farmers and purchasers in the Cowichan Region, Cowichan Green Community Office, 360 Duncan St.

March 5, 6:30 – 7:55 p.m. – Tim’s Tuesday Free Swim, Frank Jameson Community Center, Ladysmith

March 5 – March 9, 7:30 p.m.  – “In the Heights” musical production, T. Gil Bunch Theater, Brentwood College

March 5, 8:00 p.m. – Open mic night, Duncan Garage Showroom

March 6, 10:00 a.m. – Children’s Marimba Storytime, Cowichan Library

March 6 (and every Wednesday), 12:00 noon – 1:00 p.m. – Cowichan Intercultural Society hosts ice skating, $5.00, Duncan arena

March 7, 9:20 – 10:30 a.m. – Ready, Set, Learn play and learn activities, Evergreen Independent School, 3515 Watson Ave., Cobble Hill

March 7, 10:00 a.m. – 12:00 noon – Cowichan Intercultural Society Ears and Hands Thursday, Cowichan Library

March 7 (and every Thursday), 6:00 p.m. – Spirit Drummers.  Location subject to change.  Info, 250-746-5144

March 7, 7:00 p.m. – AGM, Electoral Area C, Cobble Hill Parks and Recreation Commision, Cobble Hill Youth Hall, 3565 Watson Ave., Cobble Hill

March 7, 7:30 p.m. – “Cowichan,” a 45 minute tourism promotional film featuring local musicians in various valley locations, premiers at the Cowichan Theater

March 8, 7:00 p.m. – Cowichan Valley Capitals vs Powell River Kings, Cowichan Arena

March 9, 9:00 a.m. – Public consultation for proposed restructuring by the Cowichan Valley School District, Quamichan Middle School

March 9 (and every Saturday), 9:00 a.m. – 2:00 p.m. – Duncan Farmers’ Market, City Square, Duncan

March 9, 9:30 a.m. – Public meeting to discuss changes to the operation of the weir, Lake Cowichan Centennial Hall, 311 South Shore Rd

March 9, 10:00 a.m. – 3:00 p.m. – Cobble Hill Seedy Saturday, Cobble Hill Hall, Watson Ave.

March 9, 1:00 p.m. – Public consultation for proposed restructuring by the Cowichan Valley School District, George Bonner Middle School

March 9, 2:00 – 4:00 p.m. – Monotype demonstration by Betty Cavin, Loft Gallery, Mill Bay

March 9, 5:30 – 10:30 p.m. – Cowichan Theraputic Riding Association fundraising Gala, “Fox and Hounds” dinner and auction, Duncan Travelodge

March 9, 7:00 p.m. – Cowichan Valley Capitals vs West Kelowna Warriors, Cowichan Arena

March 9, 7:00 p.m. – Dance with The Esquires, Chemainus Seniors Drop In Center.

March 10, 1:00 – 6:00 p.m. – Cowichan Chef’s Table for MS, Providence Farm.  Info and tickets, 25-=748-7010 or anne.muir@mssociety.ca

March 13, 6:30 p.m. – Zumba fundraiser (ages 16+), Drinkwater Elementary School.  Info, 250-748-2820 or debandmat@shaw.ca

March 14, 9:00 a.m. – 4:00 p.m. – Tourism Pro D Day, Cowichan Golf and Country Club.  Info, http://tvitour.ca

March 14, 7:00 p.m. – Shawnigan Lake Community Center Commission AGM, Shawnigan Lake Community Center, 2804 Shawnigan Lake Rd.

March 15 – 17 – Fire and Bones boys’ weekend, hosted by West Coast Men’s Support Society, Shawnigan Lake.  Info, 250-597-2801

March 15 – 21 – Spring Family Celebrations at Merridale Ciderworks.  Info, www.merridalecider.com

March 15, 2:30 – 8:00 p.m. – Chamber of Commerce Home, Garden, and Business Show, Aggie Hall, 1110 First Ave, Ladysmith

March 16 – 17 – Orca  Invitational Gymnastics Competition. Info, 250-746-0193 or www.ddgc.ca

March 16, 8:00 a.m. – 3:00 p.m. – Shawnigan Lake Community Center Commission first annual garage sale, Shawnigan Lake Community Center, 2804 Shawnigan Lake Rd.

March 16, 9:30 – 11:00 a.m. – Pancake Breakfast, $5.00, Chemainus Seniors Drop In Center.

March 16, 10:00 a.m. – 4:00 p.m. – Chamber of Commerce Home, Garden, and Business Show, Aggie Hall, 1110 First Ave, Ladysmith

March 16, 6:30 – 7:55 p.m. – Pirate Swim, Frank Jameson Community Center, Ladysmith

March 23, 7:00 p.m. – Dance with The Happy Hans, Chemainus Seniors Drop In Center.

March 26, - 27, 1:15 – 7:15 p.m. – Blood donor clinic, Heritage Room, 2nd floor, Island Savings Center, 2687 James St.

March 28, 12:00 – 6:00 p.m. – Blood donor clinic, Heritage Room, 2nd floor, Island Savings Center, 2687 James St.

April 6, 2:00 – 4:00 p.m. – Coloured pencil techniques demonstration by Lawrence Bellows, Loft Gallery, Mill Bay

April 7, 10:00 a.m. – 4:00 p.m. – Easter hunt and family day at BC Forest Discovery Center.  Info, http://www.bcforestmuseum.ca


Are you, or do you know, an artist who might be interested in this opportunity:

The City of Duncan is pleased to invite artists or artist teams to enter an open public art competition for a commission of up to $25,000 to create a permanent work of art to be installed within the City of Duncan.  Proponents are asked to consider not only the work of art, but also the appropriate location for it.  Projects proposed must be publicly accessible and located on public property such as City-owned or controlled parks, boulevards, or buildings.  Each artist/team is limited to one entry.

This opportunity is open to established and emerging artists, or artist teams who are able to meet the creative, eligibility and performance criteria and who can demonstrate the skills to manage all phases of production and implementation – from design to installation, and have the ability to meet timelines and work cooperatively with others.

The RFP accepts paper submissions via mail or delivered in person.  Electronic submission are also accepted and encouraged.  Submissions must be complete and strictly adhere to the Guidelines and Submission Requirements contained in the Request for Public Art Proposals, Terms of Reference (available on the City’s website www.duncan.ca) or risk not being considered.  Faxed submissions will not be accepted. 

Submissions must be received by Tuesday, April 2, 2013 @ 3:00 pm

The City reserved the right to reject any or all responses, to waive defects in any proposal documents and to accept any proposal or offer which it considers to be in the best interest of the City.  The lowest or any tender offerwill not necessarily the accepted.

For further information contact:  Peter de Vertuil, Telephon:  250-746-6126, email peter@duncan.ca

Source:  Cowichan Valley Citizen, Friday, March 1, 2013


Tuesday, 19 February 2013

Peaches and Cream Crescent Squares


We all have a few guilty pleasures; things we enjoy even though we know they're not good for us.  

One of mine is Pillsbury crescent rolls.  

I just love 'em.  Couldn't really tell you why, but I do.

Fortunately, as guilty pleasures go, crescent rolls are not a particularly expensive indulgence.  I often find coupons for them and, when I pair the coupons with sale pricing, I can buy them for less than a dollar a tube. (I tell myself I could scarcely make them from scratch for so little. ;)

A while ago, I picked up four of those alluring blue tubes from the dairy case, and also found cream cheese on sale for a very good price.  

I brought my bounty home and then pondered what to make from it. Clearly a visit to Pinterest was in order.

(Don't you just love Pinterest?  It's become as much an oracle for me as Google is.)

Pinterest did not fail me.  It yielded up many enticing recipes, including a simple cheese danish from The Adventures of a Kitchen Girl.

I love cheese danish!  A cheese danish made with crescent rolls was right up my alley.

Because I can't leave a recipe un-messed-around-with, I decided this one needed some fruit and, because I'm big on shopping my pantry, I decided to add in some home canned peach slices.  

Oh-my-goodness-the-results-were-amazing!  I will definitely be serving this to company sometime soon.

To make Peaches and Cream Crescent Squares, you'll need:


  • 2 eight-ounce packages of cream cheese, at room temperature
  • 1 cup sugar
  • 1 teaspoon vanilla extract
  • 1 egg
  • 2 pints of peach slices (or 2 tins, if you don't have home canned)
  • 2 tubes of crescent rolls (I used the jumbo ones because there are fewer seams to press closed but the regular ones will work just fine too.)
  • 1 egg white

Put the cream cheese and sugar in the bowl of your mixer and beat them until well combined.  Add in the vanilla extract and egg and continue mixing until the batter is very smooth.


Open one of the tubes of crescent rolls and press the dough into a 9 x 13-inch pan.  The dough should come part way up the sides of the pan like this:


Spread the cream cheese mixture over the crescent roll dough.


Drain the peach slices and arrange them on top of the cream cheese mixture.


Open the second tin of crescent rolls and use the dough to make a top crust, pressing it together along the seams and joining the outside edges with the dough used to line the bottom of the pan.  

Add a little bit of cold water to the egg white (I used about 1/2 teaspoon) and then beat it with a fork until it becomes frothy.  

Brush the egg white over the top crust.

Bake the assembled pastry in a 350F oven for 35 - 45 minutes, until it's golden-brown.


Remove it from the oven and allow it to cool.

When the pastry has cooled, combine


  • 1/2 cup icing (powdered) sugar
  • 2 Tablespoons milk
  • 1/2 teaspoon vanilla extract

beating until the mixture is very smooth.  

Pour the glaze over the cooled pastry in the pan and allow it to set.  


I cut the pastry into 12 squares.  It's quite rich, though, so you could easily get away with serving smaller portions.

Store any leftover squares in the refrigerator.


Are you on Pinterest?  You can find my boards at http://pinterest.com/AuntBsKitchen/
You can find me on Twitter too, at @AuntBsKitchen.

Tuesday, 5 February 2013

Fortune Teller Fun


Are you a doodler?  

I am.

Whenever I'm still for any period of time and have a piece of paper in front of me, the paper is filled with little geometric patterns, with cartoons, with lettering.  

My lecture notes from college were often hard to read because they were so obscured by doodles. The same is now true of my notes taken at office meetings.  The pages of our phone book have been embellished again and again during time I've spent waiting "on hold."

I like to colour too, and download printable colouring pages with which to occupy my hands during quiet days at work or evenings in front of the TV.  

Do you enjoy colouring?

If you're a doodler or a colourer, this post is for you.  It's not my usual sort of thing but, a couple of weeks ago, I was stuck in bed sick with the 'flu and this project grew out of my quiet time.

I came across a post on Pinterest for a printable fortune teller (we called them "cootie catchers" when I was a kid) and thought "Wouldn't it be fun to make one of my own!"

I marked off a square, divided it where the folds would be, and began to doodle.  This is what I ended up with.  I thought you might enjoy it too.  

You can print one to colour yourself if you'd like to.  There's a link to a printable PDF below the black and white image.


Once I'd finished drawing my fortune teller, I coloured it in.  It looked like this when I was finished:


Here's what it looked like when I'd folded it:


If you'd like to fold yours too, here's how:

First, trim away the thick black edges all the way around, to make an eight inch square.  

Fold the square in half.


(Please excuse all the extra creases in my photos.  I had to pre-fold my fortune teller to work out the steps before sharing them with you.)

Fold the fold in the other direction so it makes a visible crease down the center of the paper. 


Spread the paper flat, with the crease vertically down the center, then fold each side inward so that the edges of the paper rest against the center crease.  Crease them sharply against the folds.  When you take your hands off the paper, the folds will spring open, looking like this:


Flatten the paper out , turn it 90 degrees, then repeat the folds again, perpendicular to the first set.  After the folds are done your paper should be creased into eight 2-inch squares.  (I've drawn lines to show you where since they didn't show up well in my picture.)


Turn the paper paper coloured side down and fold the corners back diagonally so that they meet at the center of the paper.  


Turn the paper over that the folded parts are underneath.  It should look like this:


Write your fortunes into the blank triangles.

Once you've written in your fortunes, fold the corners toward the center again.  The numbered part of the paper will cover the center design.  Be sure to crease firmly along the folds.


The next fold confused me at first but it's actually very simple.  Fold your square vertically into a long rectangle, with the numbers inside and the squares with the colour names on the outside.  It will look like this.


Pick the folded paper up with the center fold pointing downward, towards the palm of your hand.


Use your fingers to pinch the diagonal folds near the center of the bottom fold, and the fortune teller will open up.


Place the forefinger and thumb of each hand into one of the pockets formed by the colour name flaps, and play away.

Have fun!


Want to learn more?  

If you'd like to learn how to play the fortune teller game, or would like to see more instructions on how to fold one, this link from Dreamworks Animations is very helpful.
_____________________________________

This post is linked to Hearthfelt Hopes blog hop hosted by Aliso Kitchen

Tuesday, 22 January 2013

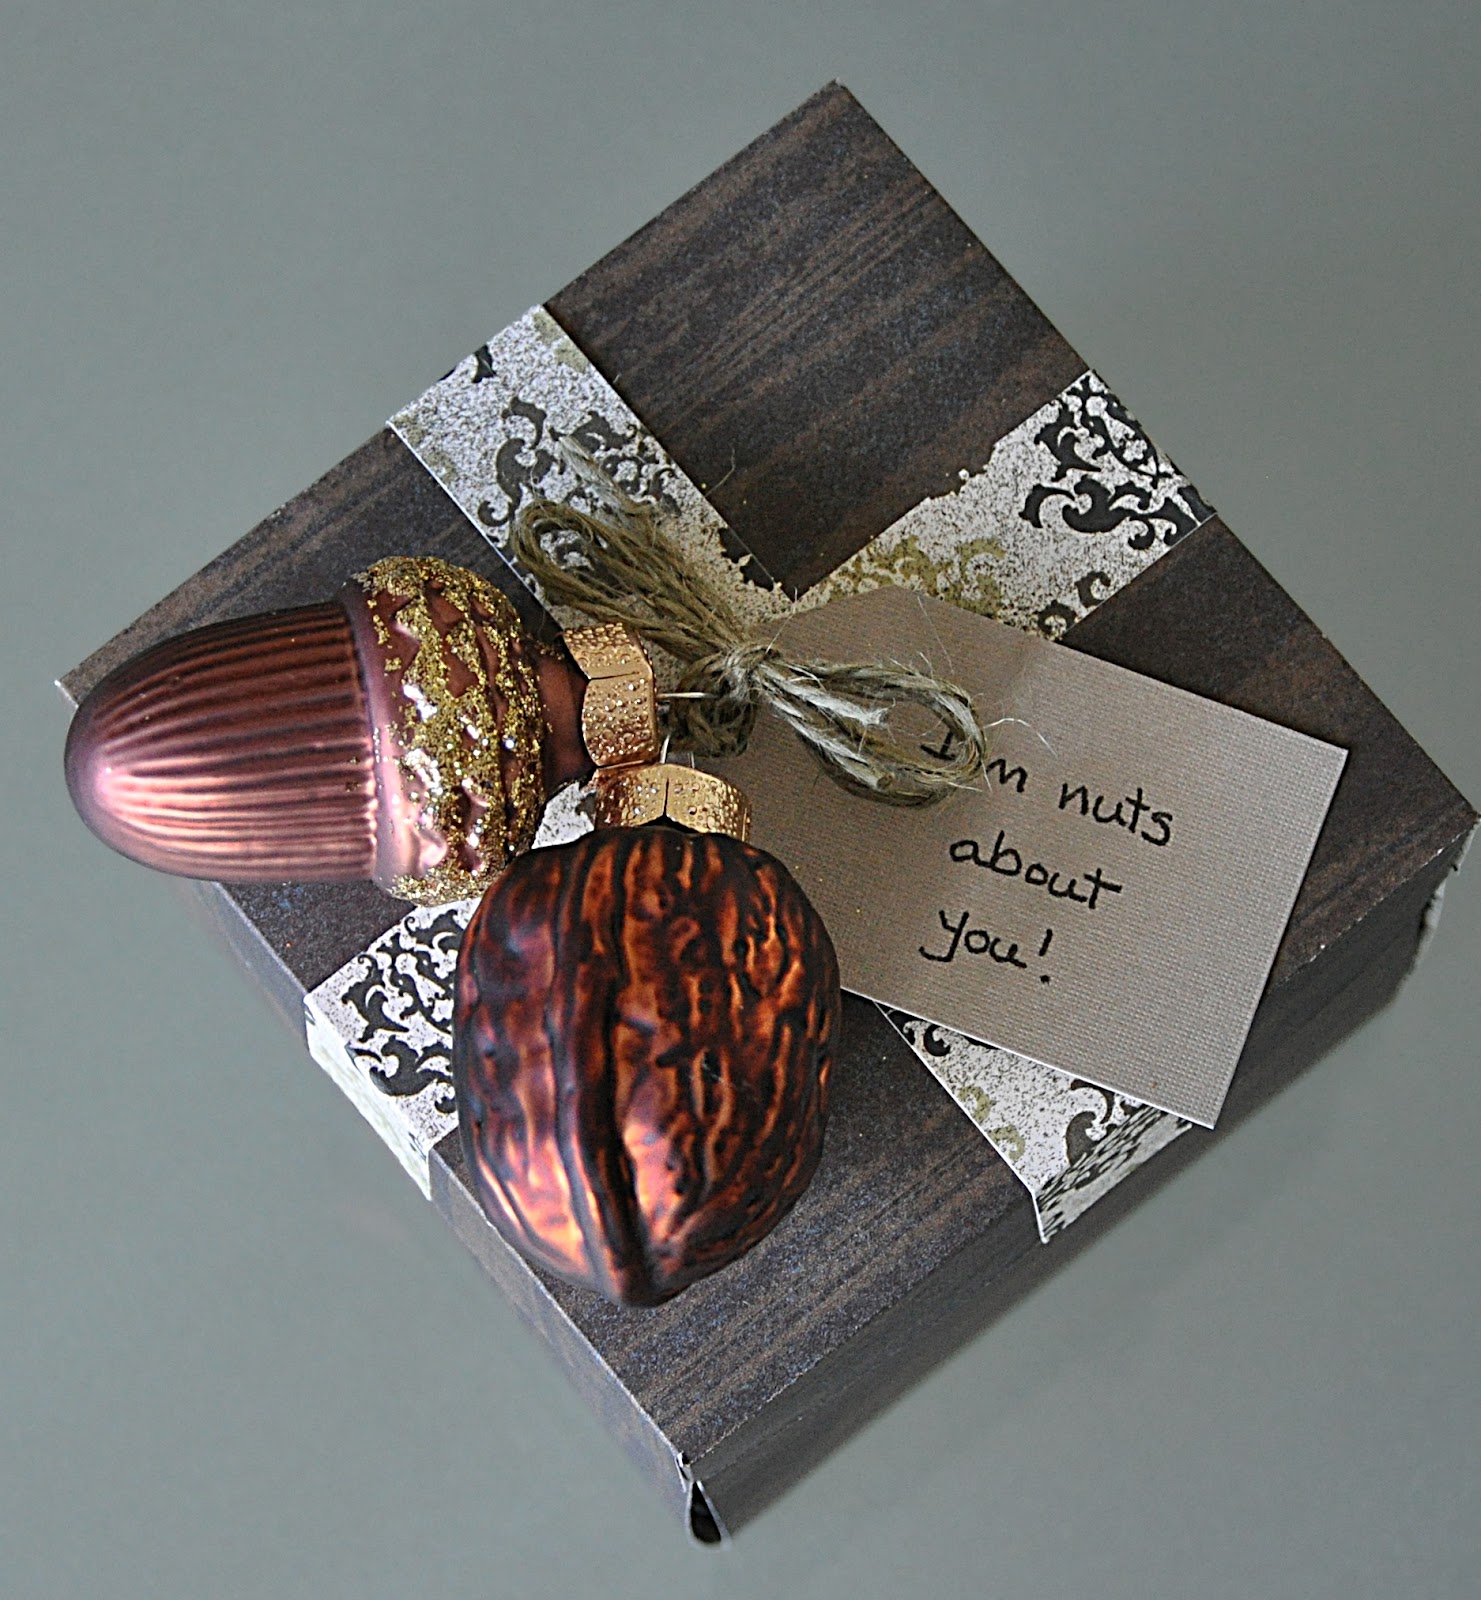
Creative Ways To Say "I'm Nuts About You."


We used to make a big thing about holidays.  From New Years right through to Christmas, we celebrated them all.  We decorated the house, sent cards to our loved ones, made special meals.  If a holiday didn't present itself, we'd celebrate the season, with a new wreath on the door and new plants in the pots by the front door.

Then things changed.  We had a number of hard years, financially, and - just when we were getting back on our feet - I got sick.  It's been a challenge to make ends meet and, in the process of providing for necessities, holiday celebrations fell by the wayside.

It's been interesting to me.  I've learned just which traditions mean the most to us, and why.

You won't find a Valentine's wreath on our door, or heart strewn banners or bunting in our home, but - perhaps surprisingly - we do still make a special occasion of Valentine's Day.

After so many years together, with the challenges that recent years have brought our way, my husband and I have come to value each other more deeply than ever.  We appreciate the opportunity Valentines Day affords us to celebrate our good fortune in finding, and keeping, each other.

Our Valentine's celebration is usually a homemade affair and, with Valentine's Day less than a month away, I've been giving this year's projects some thought.  

There's so much great inspiration out there!  

Here are some ideas that have caught my fancy.


I made this photo box for my husband a while ago.  It's a lovely way to share happy memories with a loved one, and you can easily adapt the colours and motif to suit your personal taste.


I haven't decided on a card yet, but this 3-D valentine from The Creative Place is awfully cute.  It folds flat, too, so there would be no extra postage required should you wish to send it in the mail.


I want to make these bacon hearts from The Paper Mama for my fella on Valentines Day morning. I know my guy'll will be delighted by them.


I might even serve this egg in a basket from Reclaiming Provincial along with the bacon. 


I'll leave my guy a couple of his favourite chocolate bars on Valentines Day, hidden somewhere for him to discover while I'm at the office for the day.  These chocolate bar wrappers from Jeanne Winters Inspiring Ideas will give him a chuckle.


Valentine's Day dinner is usually a co-operative effort at our house.  My fella cooks the protein (often steak, which is another huge treat for both of us) and I prepare the vegetables and dessert.  I think that these little heart shaped roast potatoes from Haniela's; from my kitchen to yours will make an excellent side dish.


Of course, it wouldn't be Valentine's Day dinner without some sort of chocolate dessert.  I'm going to make Hammer Cookies this year.  Instead of slicing rounds, I'll roll the dough out and cut heart shapes.  The pretty red and white tops will make a lovely finishing note to our meal.

So, that's the plan.  

How do you celebrate Valentines Day?  Any special traditions at your house?  

I'd love to hear about them.

Related posts:
Folded Heart Bookmark
A Valentine For Grandma
The Gift of a Letter

Saturday, 5 January 2013

Eggnog Latte Tartlettes


When I make a recipe I enjoy, I find myself looking for new ways to use it.  So, when the coffee cookies I made before Christmas turned out so well, I wanted to find another way to enjoy them.  

I also really liked the eggnog pudding I used in my apple and eggnog trifles.  

Eggnog is on sale right now, so it seemed a good time to play mad scientist in the kitchen.

These little bites of heaven were the result.

The shells for these little tartlettes are made with the dough for my coffee cookies and they're filled eggnog pudding.  I finished them with a dollop of whipped cream and a sprinkle of nutmeg.

So good!

Begin by making the shells for the tartlettes.  You'll need:  

  • 2 Tablespoons instant coffee
  • 2 Tablespoons boiling water
  • 180 grams butter (when I scaled this out it came to 7 ounces - 1-3/4 sticks - of butter)
  • 3/4 cup sugar
  • 2 Tablespoons instant coffee
  • 2 Tablespoons boiling water (not pictured)
  • 2 cups flour
  • 1/2 teaspoon baking powder
  • 1 egg white (not pictured)
  • 1 teaspoon cool water (not pictured)
  • a small amount of granulated sugar for sprinkling on the cookie tops

Begin by dissolving the instant coffee into the boiling water.  Set it aside and let it cool to room temperature.

While the coffee is cooling prepare a couple of mini muffin pans.  Butter each muffin cup even if the pan is non-stick, otherwise you'll have a difficult time getting the baked shells out of the pan.

When the coffee has cooled, cream together the butter and sugar.  

Mix the coffee into the butter and sugar until it's been completely incorporated.


In a separate bowl, mix together the flour and baking powder.

Add the flour mixture to the coffee/butter/sugar mixture and stir to make a stiff dough. (I ended up kneading it a three or four times in order to get all of the flour to absorb.


When the dough is prepared press it into the individual cups in the mini muffin pan, forcing it up the sides of the cup and making fairly thick walls.  Don't worry about perfection here.  You're only going to see the outside walls of the tartlette shells.  The rest will be filled or covered up.


Bake the tartlette shells in a 350F oven for about 15 minutes, just as you would bake cookies.  They'll puff up a little bit.  It's okay, the thicker walls will help the shells hold together when you remove them from the pan.


Allow the shells to cool completely in the pan before removing them for filling.

While the tartlette shells are cooling, make the filling and topping.  You'll need:


  • 2 cups of ready made eggnog 
  • 2 Tablespoons cornstarch
  • 1/4 teaspoon nutmeg
  • 1 cup whipping cream
  • 2 teaspoons extra fine sugar
  • 1/2 teaspoon vanilla extract
  • a little nutmeg for garnish

Whisk the eggnog, cornstarch, and 1/4 teaspoon nutmeg together in a small saucepan. Stir them over medium-low heat until the pudding comes to a boil and thickens.

As soon as the pudding thickens, remove it from the heat.  

Cover the pudding with plastic wrap, making sure that the plastic was sitting right on the surface of the pudding (this prevents a skin from forming).  Set it aside to cool to room temperature.


When both the shells and the filling are cooled, it's time to assemble the tartlettes:

Spoon or pipe a little of the filling into each shell.  Fill only as many shells as you are likely to use in a single sitting.  

Put the filled tarts in the fridge until they're chilled through.  Store the rest of the shells in a cookie tin until you're ready to serve them.


When the tarts are chilled through and you're ready to serve them, whip the cream until it forms soft peaks.  

Add in the extra fine sugar and vanilla extract and continue whipping until the cream holds stiff peaks.


Pipe some whipped cream onto the top of each filled tartlette.  Garnish each one with a little sprinkle of nutmeg.


Enjoy your eggnog latte tartlettes with a good cup of coffee, or package them up on a pretty plate and give them as a gift.  


Monday, 24 December 2012

Christmas Jumble Cookies


These cookies came to be a couple of years ago because I looking for a way to us up the bits and bobs left over from my Christmas baking.  I had a little mincemeat left over, a few glace cherries, and some walnuts, so I decided to mix them into one of my go-to cookie doughs.

The finished cookies had a good flavour but they were very plain and not overly sweet.  I filled the cookie jar without saying anything at all about them, not optimistic that Himself the Elf would eat them.  

Much to my surprise, the cookies "evaporated" from the jar at a rapid clip and, when Christmas rolled around the following year, my fella requested that I bake them again. They're now a regular part of my Christmas baking routine.

To make Christmas Jumble Cookies, you'll need:


  • 1/2 cup butter
  • 3/4 cup sugar
  • 1 egg
  • 1/2 teaspoon vanilla extract
  • 1/2 cup mincemeat
  • 1-3/4 cups flour
  • 1/4 teaspoon baking soda
  • 1/2 cups glace cherries, cut in quarters
  • 1/2 cups chopped walnuts


Cream together the butter and sugar.  

Beat the egg and vanilla together.  Mix them into the butter and sugar along with the mincemeat.


Stir together the flour and baking soda.  

Add in the glace cherries and walnuts.  The cherries will want to cling together in a big clump.  Use your hands to work them apart and toss them through the flour so that each piece is coated.


Add the flour mixture to the butter mixture and stir them together until all the flour is moistened and a firm dough is formed.


Scoop the cookie dough onto parchment lined cookie sheets, making 1-1/2 inch balls and spacing them about 2 inches apart.

Dampen your fingers with a little water and then press each cookie to flatten it.  The cookies should be about 1/3 inch thick.


Bake the cookies at 350F for 12 to 15 minutes, until the edges are lightly browned.  

(Insert embarrassed blush here.  I just realized I forgot to take a picture of the cookies after they came out of the oven.  Oops!)

Cool the cookies on racks and store them in an airtight container.  

Both the unbaked dough and the baked cookies freeze very well.  If you form the unbaked dough into cylinders and refrigerate it, then slice it to make thinner, flatter cookies, they make excellent cookie sandwiches.  You can fill them with plain buttercream frosting or with the orange and cream cheese frosting I used on my Cranberry Spice Bars.