It happens every holiday season: You get company you're not expecting.
Although you're delighted to see them, drop in visitors have a way of arriving when you're least prepared for them. If the house is a mess, the bathroom needs cleaning, and the beds are unmade, I can be pretty sure we'll have unexpected company.
I no longer apologize about the state of my house. My guests are here to see us, not our home, and if they can't overlook the untidiness they shouldn't be dropping by.
I do, however, feel strongly that every guest should be offered some sort of food and drink every time they visit. It's a rule. A visit during which no food and drink is offered means poor hospitality to me.
These biscuits were made in response to just such a drop in visit. I needed something that could be quickly assembled from ingredients I had on hand.
They turned out well, even if I do say so myself; with a surprisingly big, peppery flavour to which the goat cheese provided a pleasant, tangy counterpoint.
I served my biscuits with pepper jam on the side. The peppers in the jam added a sweeter high note that complimented the flavours in the biscuits nicely.
To make black pepper and rosemary biscuits with goat cheese, you'll need:
- 1 cup all purpose flour
- 1 cup whole wheat flour
- 1 Tablespoon baking powder
- 1/2 teaspoon salt
- 1 teaspoon finely chopped fresh rosemary
- 1 teaspoon freshly ground black pepper
- 2 Tablespoons cold butter
- 3/4 cup milk
- about 3 ounces of chevre
Whisk together the flours, baking powder, salt, rosemary, and black pepper.
Cut the butter into slices and add it to the flour mixture. Rub the pieces of butter between your thumb and forefinger to break them down to the size and shape of cornflakes.
Use your hands to gently toss the butter through the flour.
Make a well in the center of the flour mixture and add in the milk.
Stir to make a stiff dough, then knead the dough in the bowl a few times, until it holds together. Try not to overwork it.
Roll the dough out about 1/3 inch thick and use a biscuit cutter or cookie cutter to cut 2-inch rounds.
(I used a fluted cutter because that's what I had, but the fluting is lost as you assemble the biscuits. A plain cutter will work just as well.)
Scoop a small amount of chevre (about 1/2 to 3/4 teaspoonful) and place it in the center of one of the dough rounds.
Place a second round of dough on top of the cheese and then pinch the edges of the two biscuit rounds together.
Continue to assemble biscuits in this manner, placing them on a parchment lined baking sheet as they are completed.
You can roll the dough out twice but don't roll it out a third time. The butter breaks down too much, resulting in a tough biscuit. Once you've cut as many pieces as you can from the second rolling, gather the remaining bits of dough together and form them into an unfilled biscuit. Consider it the "cook's bonus."
Brush the tops of the assembled biscuits with a little milk so that they brown, then bake them in a 400F oven for 15 to 20 minutes, until they're cooked through and a light golden brown in colour.
Serve the biscuits hot from the oven.
Every cook needs to keep a couple of party tricks up their sleeve. You know what I mean: Simple-to-make treats that come together very quickly but elicit a huge "Wow!" response when you put them on the table.
This is one of mine.
I won't pretend it's gourmet - or even that it's really cooking - but this treat is still worth knowing about. You never know when you'll need something quick and spectacular for unexpected guests, especially at this time of year.
To assemble my party trick dessert, you'll need:
- Rolos (two for each wonton you're assembling)
- wonton wrappers
- a little water in a shallow bowl
- some powdered sugar for dusting
Yup, that's all.
With a list that short, you know it's got to be simple, right?
You'll need two Rolo candies for each wonton wrapper, and you'll need one or two finished wontons per person.
Moisten the outside edge of each wonton as you work with it, then assemble your wontons like this:
Place the assembled wontons on a parchment lined baking sheet.
Bake your Rolo wontons in a 350F oven until they take on a little colour. They'll only take 10 or 15 minutes to cook.
Some of the filling might leak out of the wontons but most of it will stay inside.
Transfer the baked wontons to a pretty plate and dust them with a little powdered sugar.
Folks love these little Rolo wontons. The wrappers are very crisp, and the filling is warm and melty.
They're messy to eat, but ridiculously good.
Enjoy! You can thank me later. :)
We enjoy a fruit crisp at our house. We make them from fresh fruit or from home canned, with lots and lots of crumbly oatmeal topping on both the top and the bottom of the dish. They are a popular dessert with us, and every bit as popular for breakfast the following morning.
When my fella suggested that I make a fruit crisp recipe using cranberries and orange, I was happy to oblige and I'm so glad I did: Yumminess here!
To make Christmas Fruit Crisp, you'll need:
- 2 large pears (I used red Bartletts but any pears you like will work here)
- 2 apples
- 1 orange
- 2 cups of cranberries (I used frozen)
- 2/3 cup granulated sugar
- 1/4 cup quick cooking tapioca
- 1 cup butter
- 2 cups uncooked oatmeal (not instant)
- 2 cups all purpose flour
- 2 cups brown sugar, lightly packed
- 1/2 teaspoon baking powder
- 1/2 teaspoon baking soda
- 1/2 teaspoon salt
Peel the apples and pears and cut them up into bite-sized pieces. (I like some texture, so I try not to cut them too small.)
Zest the orange, and squeeze the juice from it.
Add the orange zest, orange juice, cranberries, sugar, and quick cooking tapioca to the pan and stir them together.
Allow the fruit to sit for a few minutes so that the sugar can draw some of the juice out.
Once there is a little juice at the bottom of the pan, set the pan on medium low heat. Allow the contents to heat through and come to a boil. Stir the pot now and again so that the fruit doesn't stick to the bottom of the pot.
While the fruit is cooking, make the oatmeal crumble.
Melt the butter in a small pot or in the microwave.
Mix the oatmeal, flour, brown sugar, baking powder, baking soda, and salt together in a large bowl.
Pour the melted butter over the oatmeal mixture and stir it until the butter is worked through and the mixture is crumbly.
Place a layer of the crumb mixture in the bottom of a baking pan or oven proof casserole. (I used a 10 x 6-inch Pyrex loaf pan, 6 inches deep, but if I were presenting this dish at the table I'd choose something more decorative.)
Spread the fruit over the bottom layer of oatmeal crumble.
Top the fruit with more oatmeal crumble, pressing it gently into place.
(I ended up with about 1/3 of the crumble topping left over. It freezes well, so I packed it in a ziploc bag and stored it away for use in another dish. I'd advise that you make the full batch even though I had some left over. If your dish is a different shape from my loaf pan, you may need more topping to fill it.)
Bake the crisp at 350F for 20 to 30 minutes, until the topping is browned and the ingredients heated through.
Christmas Fruit Crisp is best served warm. Store leftovers in the fridge and use them up within 3 or 4 days.
This is a cookie I bake every December. The bright citrus note makes a pleasant counterpoint to the chocolate and winter spices we taste so much of at this time of year.
Like all thumbprint cookies, these ones begin with a stiff cookie dough that is formed into a ball. A well is made in the center of each cookie to hold the filling.
Unlike other thumbprint cookies, the filling in lemon coconut thumbprint cookies is not baked in the oven. These cookies are filled with lemon curd, which is piped or spooned onto the cookies just before they are served.
I've used both homemade lemon curd and store bought in these cookies. I like homemade best but, if I'm pressed for time, Robertson's lemon curd is very good indeed.
To make Lemon Coconut Thumbprint Cookies, you'll need:
- 1/2 cup butter
- 3/4 cup sugar
- 1 egg
- the zest of one lemon
- 1 Tbsp. lemon juice
- 1-1/2 cups flour
- 1/4 teaspoon baking soda
- 1/2 cup shredded unsweetened coconut
Cream the butter and sugar together.
Beat the egg and add it to the butter/sugar mixture along with the lemon zest and lemon juice. Stir until the ingredients are well mixed.
In a separate bowl, stir together the flour, baking soda, and coconut.
Add the flour mixture into the butter/sugar mixture and stir until all the flour is incorporated. You'll have a stiff, slightly dry dough.
Form the dough into 1-inch balls and place them 2 inches apart on a parchment lined cookie sheet.
Make a well in the center of each cookie. (I use the handle of my wooden spoon for this.)
The dough may crack around the edges when you make the well. Just press it back together with your fingers.
Bake the cookies on the center rack of a 350F oven for about 12 minutes, rotating the pan halfway through the cooking time.
The finished cookies will not have taken on any colour, but they will be larger than when they went into the oven and the dough will have firmed up.
Transfer the cookies to a sheet of brown paper to cool.
Store the cooled cookies in an airtight container.
If you wish to make them ahead, unfilled lemon coconut thumbprint cookies can be stored in the freezer.
Just before you serve your cookies, pipe or spoon a little lemon curd into the center of each one.
If you have filled lemon coconut thumbprint cookies left over, store them in a covered container in the fridge.
This is another good, plain cookie.
No family stories associated with this one: I came across the recipe, by Treat and Trick, on Pinterest one day. It looked good to me - simple and not too sweet - so I decided to give it a try.
I made almost no changes to the original recipe and was very well pleased with the way they turned out. These cookies have a distinct coffee flavour without being bitter. They make a great accompaniment to a cup of hot chocolate; a sort of deconstructed mocha. A very nice after dinner treat.
If you wanted to fancy your coffee cookies up some, you could make cookie sandwiches with a little vanilla, or chocolate, or coffee-flavoured butter cream.
To make coffee cookies, you'll need:
- 2 Tablespoons instant coffee
- 2 Tablespoons boiling water
- 180 grams butter (when I scaled this out it came to 7 ounces - 1-3/4 sticks - of butter)
- 3/4 cup sugar
- 2 Tablespoons instant coffee
- 2 Tablespoons boiling water (not pictured)
- 2 cups flour
- 1/2 teaspoon baking powder
- 1 egg white (not pictured)
- 1 teaspoon cool water (not pictured)
- a small amount of granulated sugar for sprinkling on the cookie tops
Begin by dissolving the instant coffee into the boiling water. Set it aside and let it cool to room temperature.
When the coffee has cooled, cream together the butter and sugar.
Mix the coffee into the butter and sugar until it's been completely incorporated.
In a separate bowl, mix together the flour and baking powder.
Add the flour mixture to the coffee/butter/sugar mixture and stir to make a stiff dough. (I ended up kneading it a three or four times in order to get all of the flour to absorb.)
Form the dough into 1-inch diameter balls (I used a small ice cream scoop for this) and place them about 1-1/2 inches apart on a parchment lined cookie sheet.
Press the cookies flat and about a quarter inch thick. (I used the bottom of a drinking glass, lightly floured, to do this.)
Crack an egg white into a small bowl, add the teaspoon of water, and beat the white with a fork until the water is mixed in.
Brush a little of the diluted egg white onto the top of each unbaked cookie and then sprinkle the cookies with some granulated sugar.
Bake the cookies at 350F for 15 to 18 minutes.
Allow your coffee cookies to cool on their baking sheet for about 5 minutes, then transfer them to a rack to cool completely.
Store your cookies in an airtight container.
Coffee cookies can be frozen but, because of the sugar topping, you should put a layer of waxed paper between each layer of cookies when you pack them into their container.
I love all of the treats that come with the holidays but if I'm being honest about it I have to say that the simplest recipes remain my favourites. I'm a big fan of the "plain cookie;" the cookie without icing or filling or lots of bells and whistles. (That's not to say I'd ever refuse a fancy cookie. I'd just choose the plain cookie if offered a choice between the two. ;)
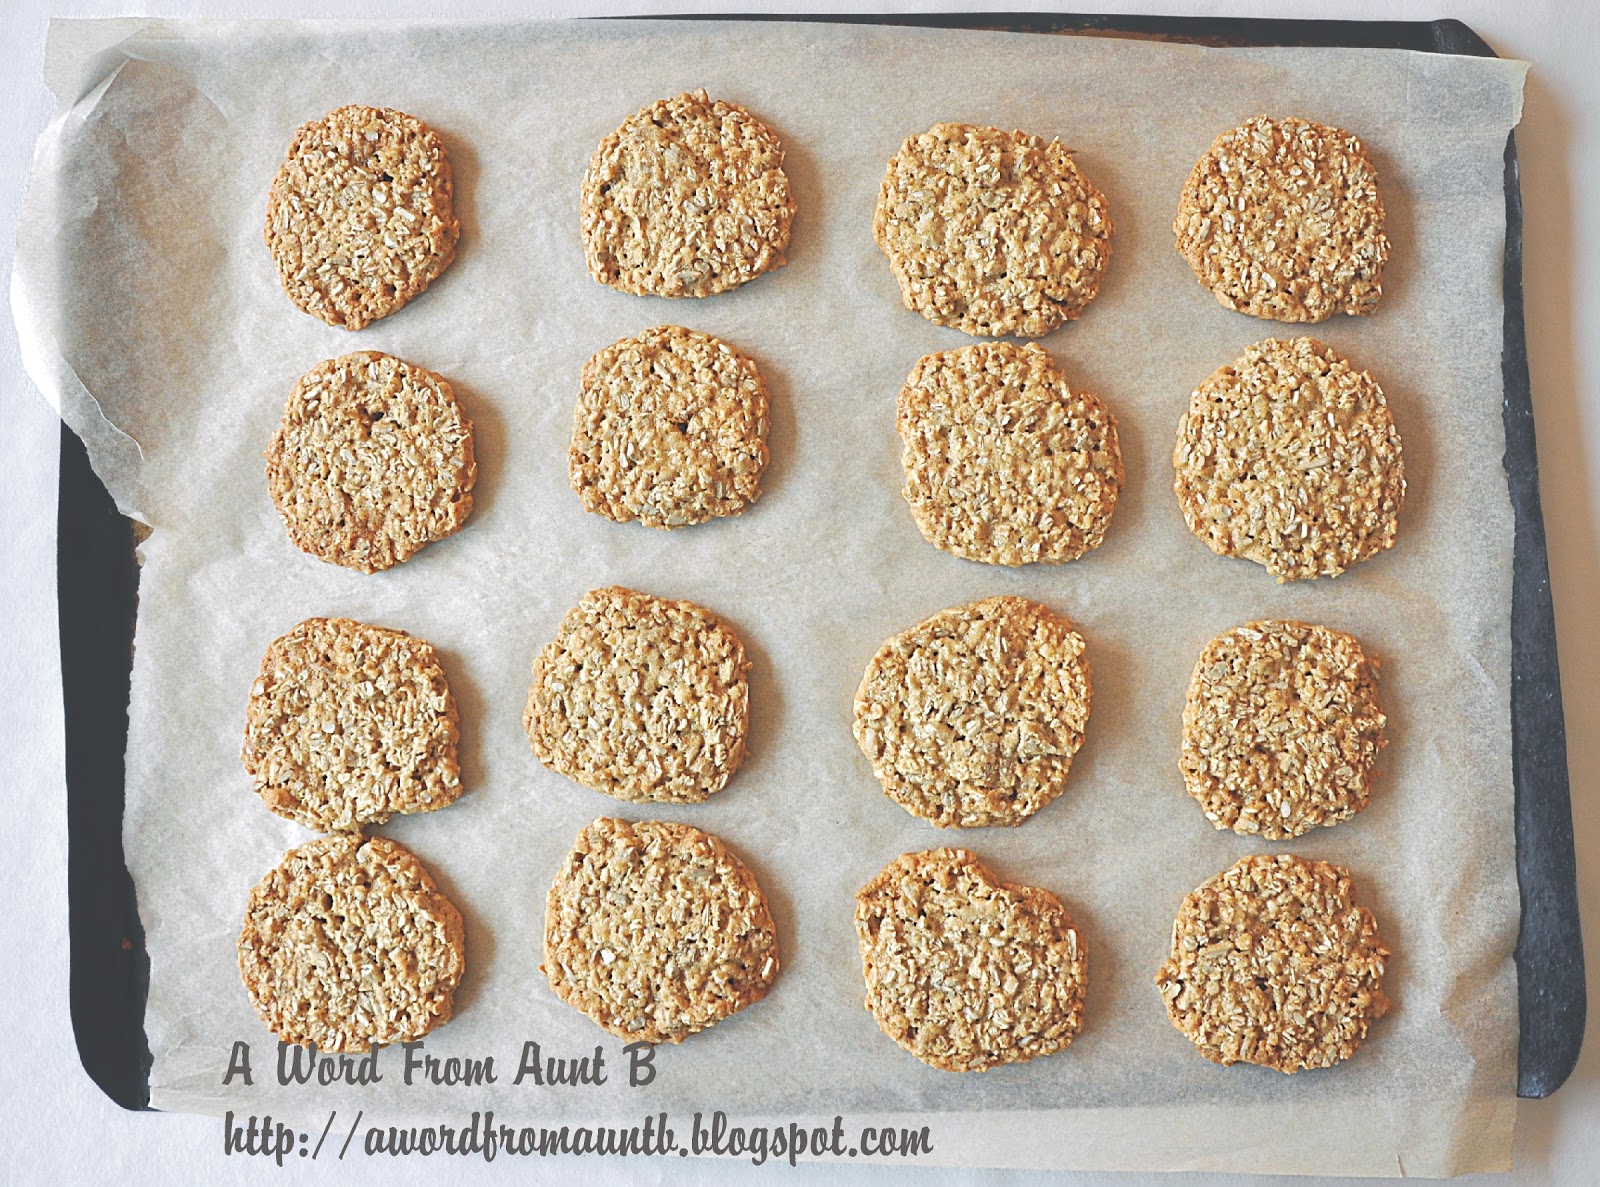
This recipe is for a plain cookie, with lots of tasty sunflower seeds and oatmeal baked right in. It has good flavour and wonderful texture.
Sunflower seed cookie dough needs to rest in the fridge before the cookies are baked, making this recipe a wonderful make-ahead option. You can prepare the dough, roll it up, store it in the fridge or freezer, and then bake the cookies a few at a time as you need them.
This recipe comes from The Fanny Farmer Baking Book by Marion Cunningham. I learned a lot of cooking from Ms. Cunningham's books when I was a beginning cook, and I refer to many of her recipes still. If you come across this book, do consider purchasing it. It's well worth the investment.
To make sunflower seed cookies, you'll need:
- 1 cup butter
- 1 cup brown sugar, packed
- 1 cup granulated sugar
- 2 eggs
- 2 teaspoons of vanilla extract
- 1-1/2 cups flour
- 1 teaspoon baking soda
- 1 teaspoon salt
- 3 cups of uncooked oatmeal (not instant)
- 2 cups raw, shelled, unsalted sunflower seeds
Cream the butter and sugars together.
Crack the eggs into a small bowl, add in the vanilla extract, and beat the eggs until there are no distinct bits of white and yolk left and the vanilla has been mixed in.
Stir the eggs and vanilla into the butter and sugar mix.
In another bowl, stir together the flour, baking soda, salt, oatmeal and sunflower seeds.
Add the dry mixture to the butter mixture and stir until the ingredients combine to make a thick dough.
Form the dough into cylinders, about 2 inches in diameter. Wrap each cylinder in waxed paper.
Store the dough cylinders in the fridge until firm, at least an hour. Store them in the freezer if you won't be using them within two or three days.
When you're ready to use the dough, use a thin, sharp knife to cut the dough cylinders into slices about 1/3 inch thick. Some of the dough may crumble from the edges of the slices when you cut them. Just press it back into place when placing the cookies on your cookie sheets.
Place the cookies about 2 inches apart on parchment lined baking sheets.
Bake the cookies on the middle rack of a 350F oven for 12 to 14 minutes, turning the pans halfway through the cooking time.
The baked cookies should be an even golden brown.
Allow the cookies to rest on their baking sheets for about 5 minutes, then transfer them to racks to cool completely.
Store the baked cookies in an airtight container.
If you wish to bake them ahead, the baked cookies freeze as well as the unbaked dough does.
Some years ago, my daughter asked if I could babysit our younger grandson for the afternoon and, knowing I would have him there, I planned a baking project we could do together.
Our wee fellow was five at the time, and a very kinetic learner, so I wanted to come up with a project that he would really enjoy. I decided we'd make some chocolate cookies and then top them with broken candy cane pieces.
My little buddy and I painstakingly removed the cellophane from our candy canes and put them in a ziploc bag. Then I gave him a hammer, sent him out on the porch, and told him to smash the candy canes to pieces.
He did so with great enthusiasm; reducing them to candy cane dust.
The pieces were smaller than I'd hoped for but we made the cookies anyway and, after a taste test, he pronounced them to be a great success. He asked if he could take them to school with him for sharing the next day, so I packed them up.
Sharing time rolled around the next morning and my grandson proudly walked to the front of the class with his cookies.
Once he had the undivided attention of his classmates, he announced, "MY grandma cooks with a hammer!"
Ever since then, this recipe has been affectionately known at our house as "Hammer Cookies." They're very good cookies, and I'm sure that you can find someone in your household who will enjoy cooking with a hammer too. :)
To make hammer cookies, you'll need:
- 4 squares of unsweetened chocolate
- 1 cup butter
- 1 cup sugar
- 1 egg
- 1/3 cup milk
- 1 teaspoon vanilla extract
- 3-1/4 cup sifted all purpose flour
- 3 teaspoons baking powder
- 1/2 teaspoon salt
- 6 ounces white chocolate (not pictured)
- about a cup of smashed candy cane pieces, in a small, wide bowl (not pictured)
Begin by coarsely chopping the chocolate and then melting it in the microwave. You should heat the chocolate in 30 second increments, stirring between each turn in the microwave. When it's melted, set it aside.
Cream the butter and sugar together.
Beat the egg and mix it into the butter/sugar mixture.
Mix in the melted chocolate.
Mix together the milk and the vanilla extract in a small bowl or measuring cup and set it aside.
In another bowl, whisk together the flour, baking powder, and salt.
Add about 1/3 of the flour mixture to the chocolate and butter mixture and stir until all the flour has been incorporated.
Add half of the milk mixture and stir until it's been absorbed.
Add another third of the flour and mix it in, then the rest of the milk and mix it in.
Finish with the last of the flour.
Form the dough into two-inch diameter cylinders and roll them in waxed paper.
Chill the dough for an hour or two, until it's firm (or store it in the freezer until you need it).
Slice the chilled dough into slices about 1/3 inch thick and place them on a parchment lined baking sheet.
Bake the cookies at 350F for about 12 minutes. The cookies will expand a bit and firm up, but won't change colour.
Allow the cookies to cool completely.
When the cookies have cooled, chop the white chocolate and melt it in the microwave just as you did earlier with the unsweetened chocolate.
Set the cookies to one side of you, the melted white chocolate and the bowl of candy cane pieces in front of you, and have a flat board or other moveable surface such as a cookie sheet off to your other side.
Use a knife or an offset spatula to spread white chocolate onto the top of a cookie, then immediately dip the white chocolate covered side of the cookie into the candy cane pieces.
Set the cookie, candy-pieces-side-up on your board or cookie sheet and then repeat this process until all the cookies have been decorated.
Allow the cookies to sit until the white chocolate hardens. Store the finished cookies in an airtight container, with a layer of waxed paper between each layer of cookies.
_________________________________
This post is linked to Gallery of Favorites hosted by Premeditated Leftovers and The 21st Century Housewife,